Configure SAML-based single sign-on (SSO) with Microsoft Entra ID (Azure AD)
Who can use this feature?
🔐 Only team owners and admins can configure single sign-on (SSO)
⭐️ Available on the Business plan.
Step 1: Prepare the configuration
Log in to Nuclino.
Open your Team settings by opening the main menu in the top left corner of the app, clicking on your team name, and then choosing Team settings.
Go to the Authentication section and choose SAML-based single sign-on (SSO).
Note the ACS URL and Entity ID.
Step 2: Set up Azure AD (Active Directory) for Nuclino
Sign in to the Azure portal using your Azure Active Directory administrator account.
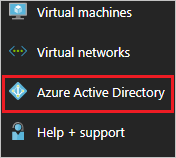
On the left navigation panel, select Azure Active Directory.
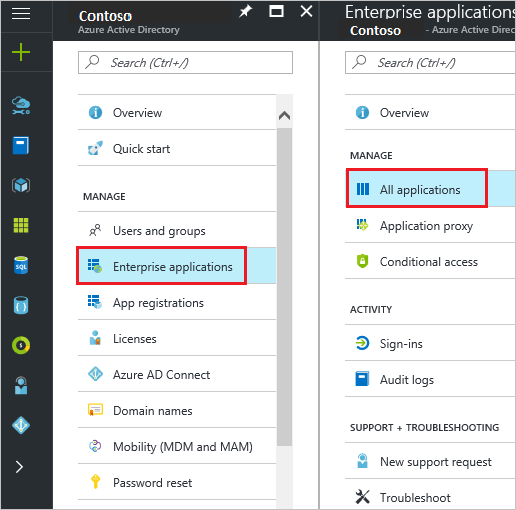
Navigate to Enterprise applications. Then go to All applications.
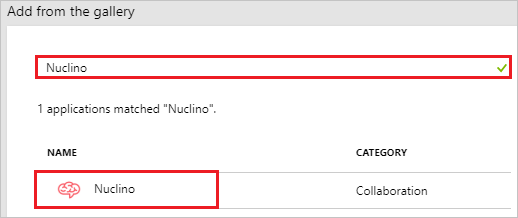
Click New application at the top of the dialog.

Type Nuclino in the search box, select Nuclino from the result panel, and click Add.
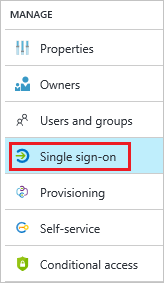
In the Azure portal, on the Nuclino application integration page, click Single sign-on.
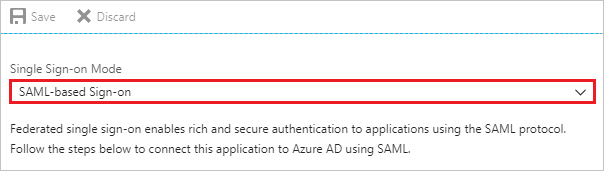
Select SAML-based Sign-on as the Single Sign-on Mode.
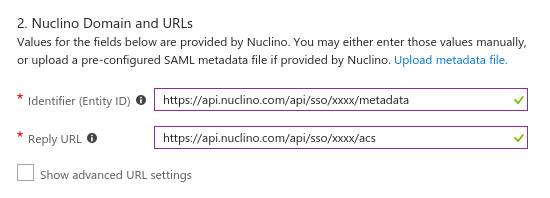
In the Nuclino Domain and URLs section, perform the following steps:
Identifier (Entity ID): Enter your Entity ID from Step 1
Reply URL: Enter your ACS URL from Step 1
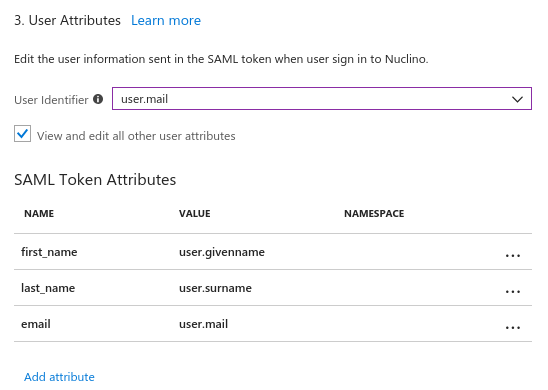
Update the User Attributes to match the following configuration:
Save the configuration by clicking on Save in the top left corner.

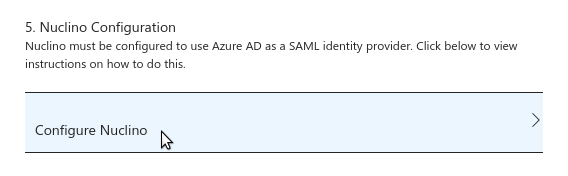
Click on Configure Nuclino.
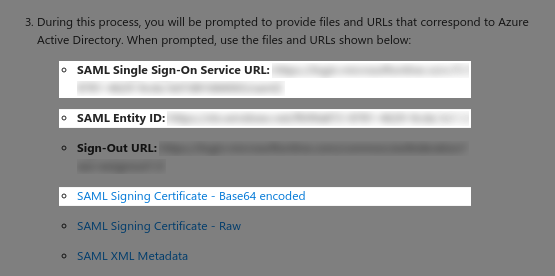
Note the SAML Single Sign-On Service URL, SAML Entity ID, and download the SAML Signing Certificate - Base64 encoded. You'll need to enter these values and the content of the certificate file in your Nuclino team settings in the next step.
Step 3: Integrate Nuclino with your identity provider
Log in to Nuclino.
Click the menu button in the top left corner to open the main menu.
Click on your team name and select Team settings.
Go to the Authentication section and choose SAML-based single sign-on (SSO).
Enter the following information
SSO URL: Enter the SAML Single Sign-On Service URL you've noted in Step 2
IDP Entity ID: Enter the SAML Entity ID you've noted in Step 2
Public certificate: Open the certificate you downloaded in Step 2 in a text editor and copy and paste the content into this field.
Click Save changes.
Optional: Enforce single sign-on (SSO)
Step 4: Assign users and groups in Azure AD
Assign users and groups to your Nuclino SAML application in Azure AD to control who should be able to access your Nuclino team via single sign-on. Please read the Azure AD documentation for more information on how to do this.
After you have successfully set up SSO
Your team can now sign up and log in via your team URL which you can find in your team settings in the Authentication section.
People who already have a Nuclino account with the same email address as their SSO account can choose to link this account. Afterwards, they can log in using their existing Nuclino account or use SSO instead.
For people who don't have a Nuclino account yet, a new account is provisioned when they log in for the first time using your team URL.
Users who have already set up SSO for their Nuclino account can also go to the normal login (https://app.nuclino.com/login) and select Log in via single sign-on (SSO).
Questions?
If you have any questions or need help to set up SSO for Nuclino, please contact us.