Configure SAML-based single sign-on (SSO) with ADFS
Who can use this feature?
🔐 Only team owners and admins can configure single sign-on (SSO).
⭐️ Available on the Business plan.
Step 1: Prepare the configuration
Log in to Nuclino.
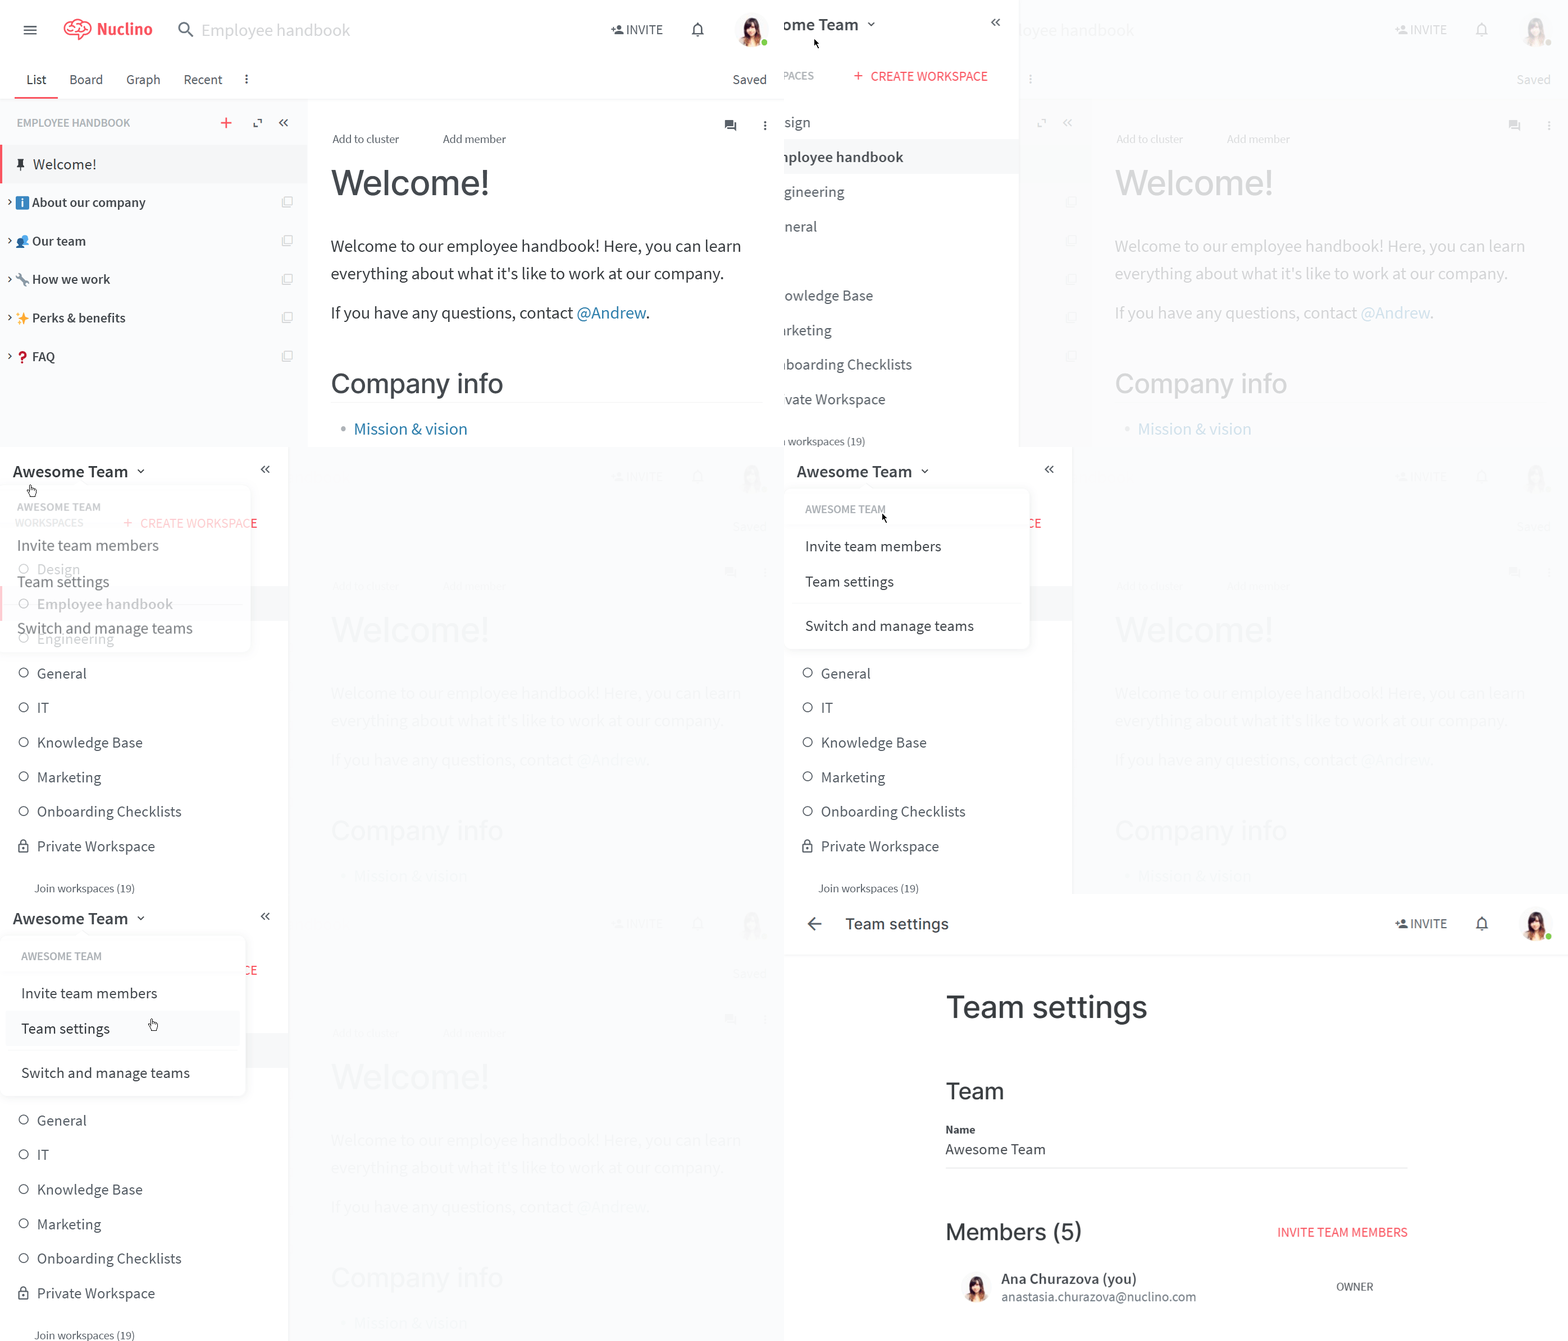
Open your Team settings by opening the main menu in the top left corner of the app, clicking on your team name, and then choosing Team settings.

Go to the Authentication section and choose SAML-based single sign-on (SSO).
Note the ACS URL and Entity ID.
Step 2: Set up ADFS (Active Directory Federated Services) for Nuclino
Open AD FS Management on your ADFS server.
Right-click Relying party trusts and select Add relying party trust.
Click Start on the welcome step.
In the step Select data source, choose Enter data about the relying party manually and click Next.
Enter a Display name e.g. Nuclino Login and click Next.
In the step Choose profile, choose AD FS profile with SAML 2.0 and click Next.
Click Next on the Configure certificate step without choosing any certificate.
Select Enable support for the SAML 2.0 SSO Web SSO protocol.
Enter the ACS URL from Step 1 as the login URL and click Next.
Enter
https://api.nuclino.comas a Relying party trust identifier.Click Next until you reach the Finish step.
Choose Open the Edit Claim Rules dialog for this relying party trust when the wizard closes and click Close. This will launch the Edit Claim Rules window.
In the Edit Claim Rules window, click Add rule, choose Send LDAP Attributes as Claims as the Claim rule template and click Next.
Enter Nuclino Attributes as Claim rule name and choose Active Directory as the Attribute store. Map the following LDAP Attributes:
E-Mail-Addresses → email
Given-Name → first_name
Surname → last_name
Click Finish.
Click Add rule again in the Edit Claim Rules window, choose Transform an Incoming Claim as the Claim rule template, and click Next.
Enter NameIDNuclino as the Claim rule name, choose E-Mail Address as Incoming claim type, Name ID as the Outgoing claim type, Email as the outgoing name ID format, select Pass through all claim values, and click Finish.
Make sure the rule Nuclino Attributes is above the rule NameIDNuclino in the Edit Claim Rules window.
Click Add rule again in the Edit Claim Rules window, choose Pass Through or Filter an Incoming Claim as the Claim rule template, and click Next.
Enter Pass Email as the Claim rule name, choose E-Mail Address as the Incoming claim type, leave Outgoing claim type as E-Mail Address, select Pass through all claim values, and click Finish.
In the AD FS Management window, right-click on the Relying party for Nuclino and choose properties. Select the Advanced tab and choose SHA-256 as the Secure hash algorithm.
In the AD FS Management window, navigate to Services and then to Certificates. Right click on the Token-signing certificate and choose View certificate... and export it as a Base-64 encoded X.509 certificate. You'll need to open the certificate in a text editor and copy and paste the content in the field Certificate data in Nuclino as detailed in Step 3.
Step 3: Integrate Nuclino with your identity provider
Log in to Nuclino.
Click the menu button in the top left corner to open the main menu.
Click on your team name and select Team settings.
Go to the Authentication section and choose SAML-based single sign-on (SSO)
Enter the following information
SSO URL:
https://[your-adfs-domain.com]/adfs/lsIDP Entity ID:
http://[your-adfs-domain.com]/adfs/services/trustPublic certificate: Open the certificate you downloaded in Step 2 in a text editor and copy and paste the content into this field.
Click Save changes.
Optional: Enforce single sign-on (SSO)
After you have successfully set up SSO
Your team can now sign up and log in via your team URL which you can find in your team settings in the Authentication section.
People who already have a Nuclino account with the same email address as their SSO account can choose to link this account. Afterwards, they can log in using their existing Nuclino account or use SSO instead.
For people who don't have a Nuclino account yet, a new account is provisioned when they log in for the first time using your team URL.
Users who have already set up SSO for their Nuclino account can also go to the normal login (https://app.nuclino.com/login) and select Log in via single sign-on (SSO).
Questions?
If you have any questions or need help to set up SSO for Nuclino, please contact us.