Candidate pipeline
Having a transparent and well-structured candidate pipeline is essential for streamlining your hiring process.
Nuclino allows your HR team to manage the entire hiring process from the first contact to the decision to hire within one centralized workspace. Collaborate on job descriptions, collect resumes, note down interview summaries, share your impressions of applicants, keep track of every candidate.
Here's how you can easily set up your candidate pipeline in Nuclino.
Step 1: Create a workspace
Let's start by setting up a workspace for your candidate pipeline.
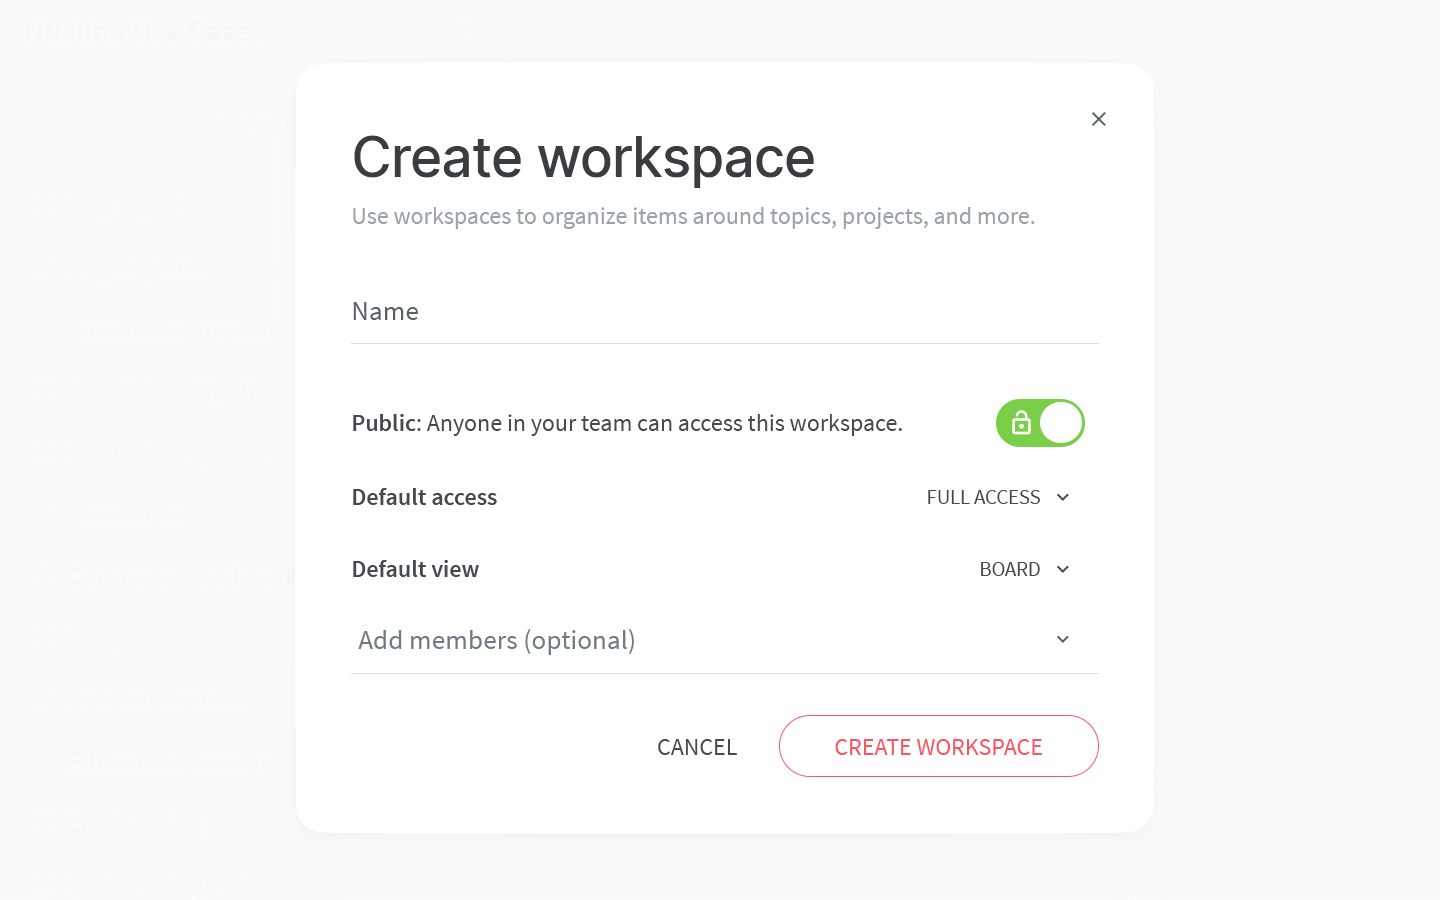
To set up your workspace, you will need to configure:
Privacy.
You can make your workspace public – visible and accessible to your whole team – or private, so that only you and invited members can see it. Since your candidate pipeline may contain some confidential information that is relevant for specific team members only, you may want to make this workspace private and invitation-only.
Access rights.
Can all your team members edit the content by default or should the workspace be comment-only or read-only? Once you add team members to this workspace, you'd be able to selectively assign the Editor, Commenter, and Reader roles to them, regardless of the default setting.
The default view of your workspace.
You have the choice between the list, board, table, and graph views. The board view is a great choice, as it allows you to visualize different stages of your recruiting process and track your candidates. Don't worry, you can always change it later!
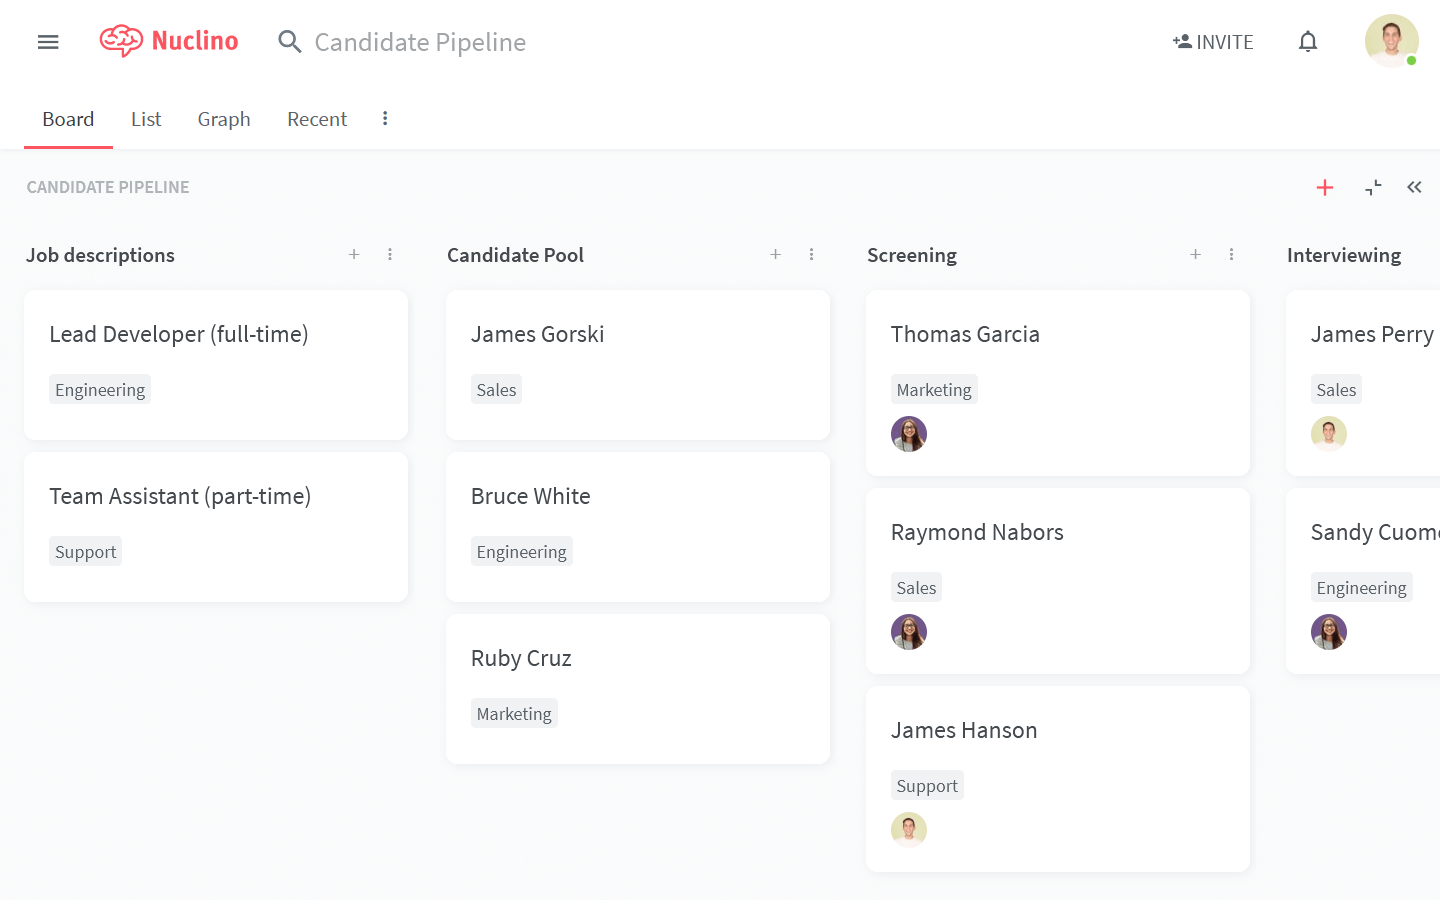
Step 2: Plan the pipeline
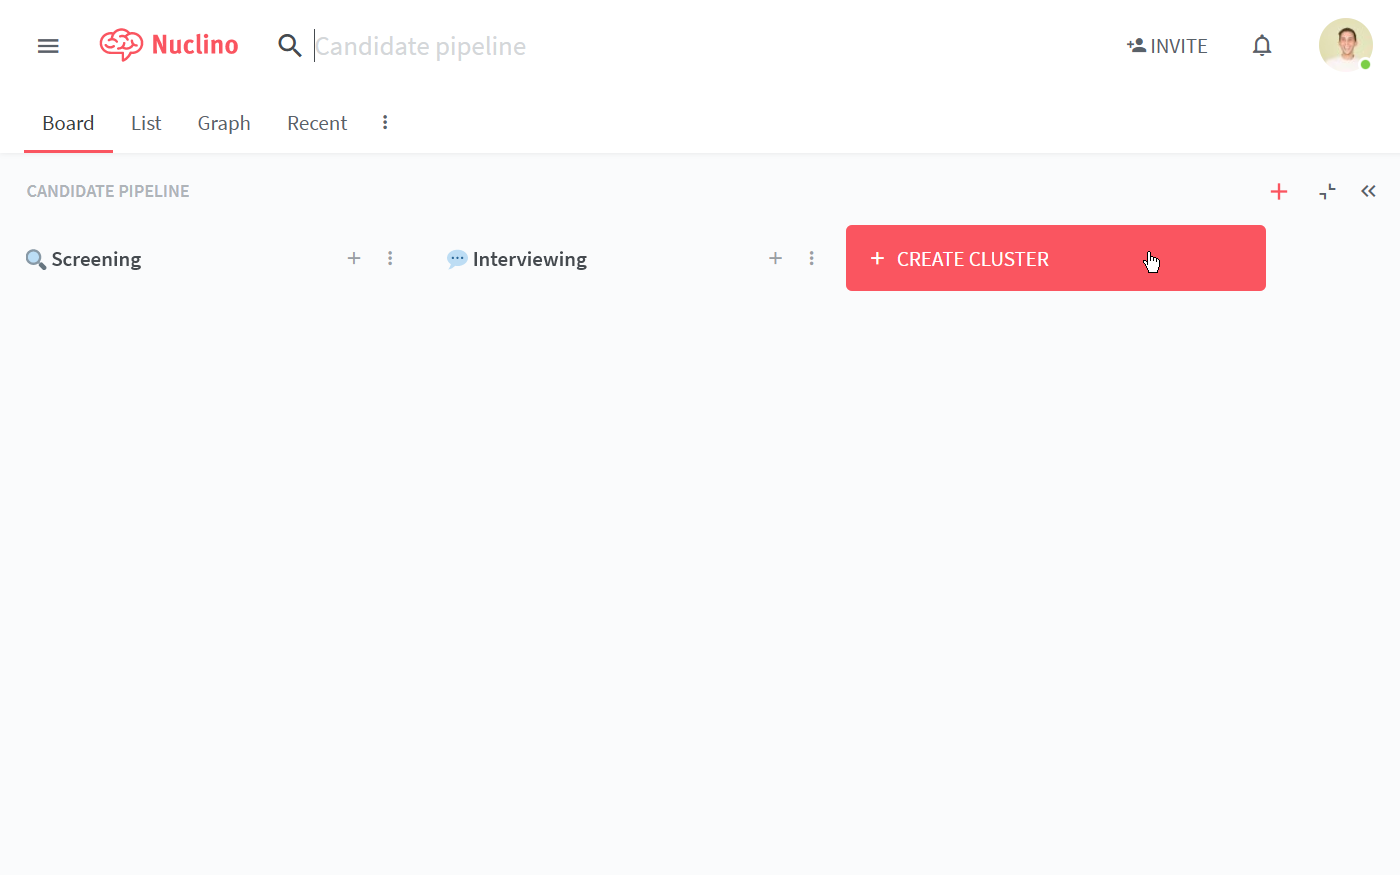
Content in Nuclino is made up of items (board cards) that are grouped in collections (board lists).
Get started by creating the collections that match the stages of your pipeline, for example:
Candidate pool
Screening
Interviewing
Offered
Hired
Every candidate in your pipeline gets a dedicated item. Once the candidate progresses from one stage to the next, you can simply drag and drop their item from one collection to another.
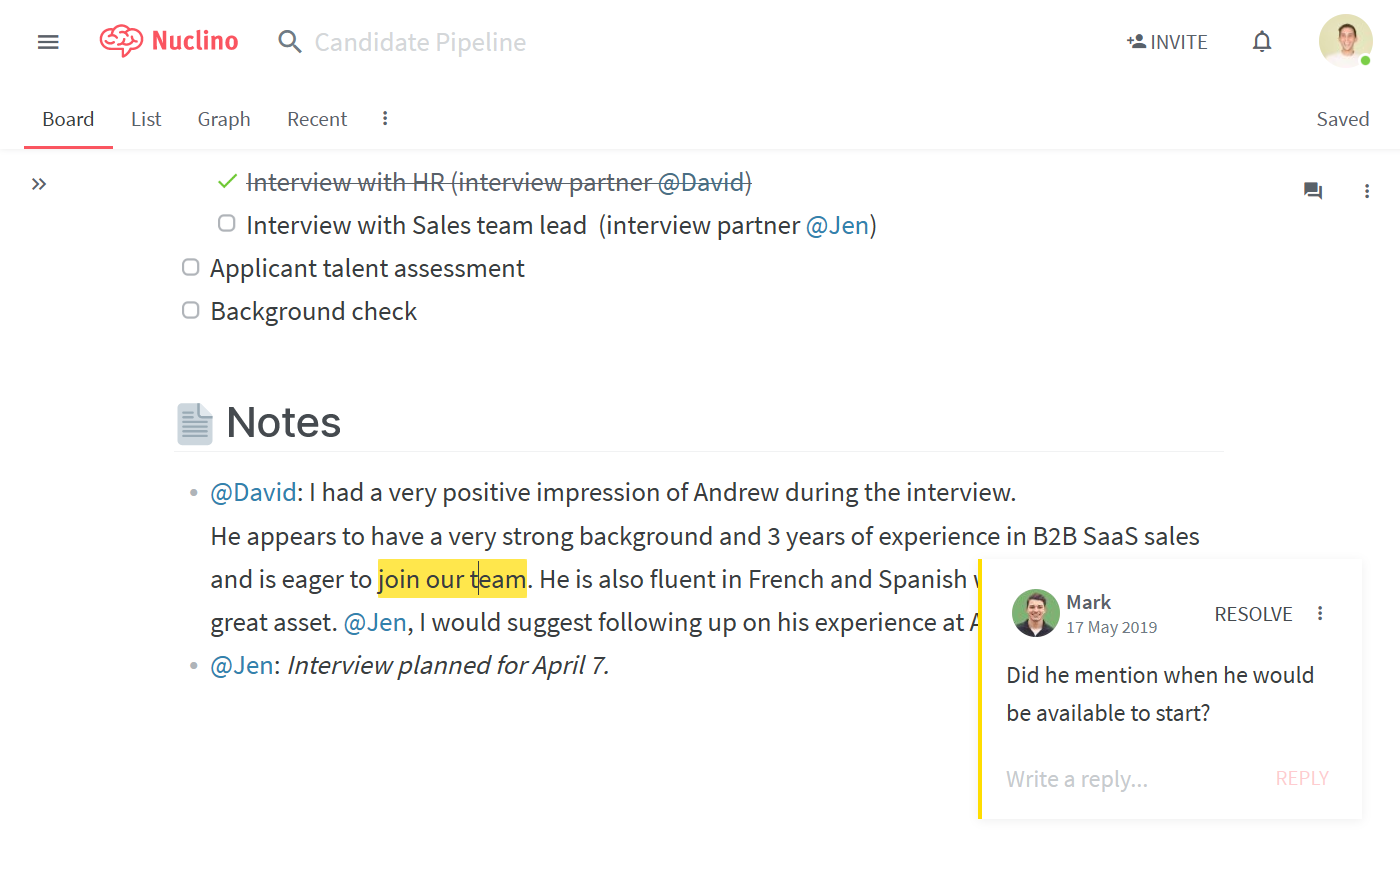
Step 3: Add candidates and discuss them with your team
Every candidate's item can be edited by you and your colleagues in real time. Note down your impressions and discuss the candidate using inline and item comments. Click Follow to be instantly notified about any new comments in the item.
To quickly draw someone's attention or request feedback, @-mention any of your colleagues, triggering an in-app or email notification on their end.
👏 You're all set!
Have questions or looking for more tips? Email us at contact@nuclino.com!