Job descriptions
Coming up with a perfect job description is a creative and collaborative task.
It needs to capture not only the requirements and responsibilities of the job, but also reflect the company culture in order to stand out and be noticed by the best candidates. Recruiting is a two-way-process, after all.
Here's how your team can easily craft exceptional job descriptions using the real-time editor of Nuclino.
Step 1: Create or select a workspace
Let's start by creating a workspace. You may want to add this information to your general HR workspace or create a dedicated workspace for your recruitment-related content.
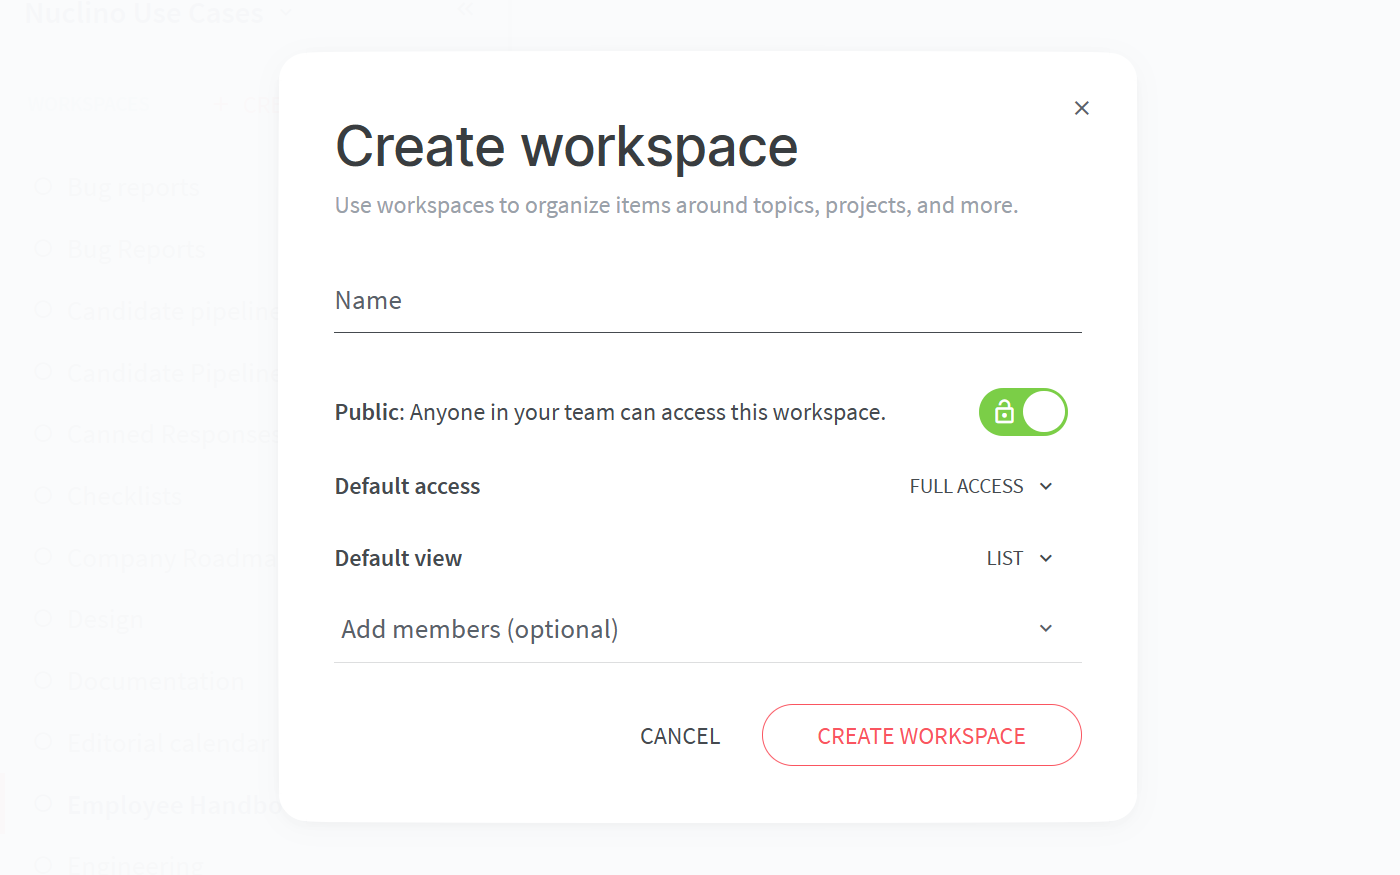
If you are creating a new workspace, you will need to configure:
Privacy.
You can make your workspace public – visible and accessible to your whole team – or private, so that only you and invited members can see it.
Access rights.
Can all your team members edit the content by default or should the workspace be comment-only or read-only? Once you add team members to this workspace, you'd be able to selectively assign the Editor, Commenter, or Reader roles to them, regardless of the default setting.
The default view of your workspace.
You have the choice between the list, board, table, and graph views. In this case, the list and board are both great choices. Don't worry, you can always change it later!
Step 2: Define your workflow
Content in Nuclino is made up of items (docs) that are grouped in collections. Get started by creating the collections.
They could represent different stages of your workflow:
Planned
In progress
Draft ready
Published
Or you could group your job descriptions by team:
Sales
Marketing
Engineering
Support etc.
Or – even simpler – you could keep your job descriptions all in one collection, adding it to an existing HR/Recruiting workspace.
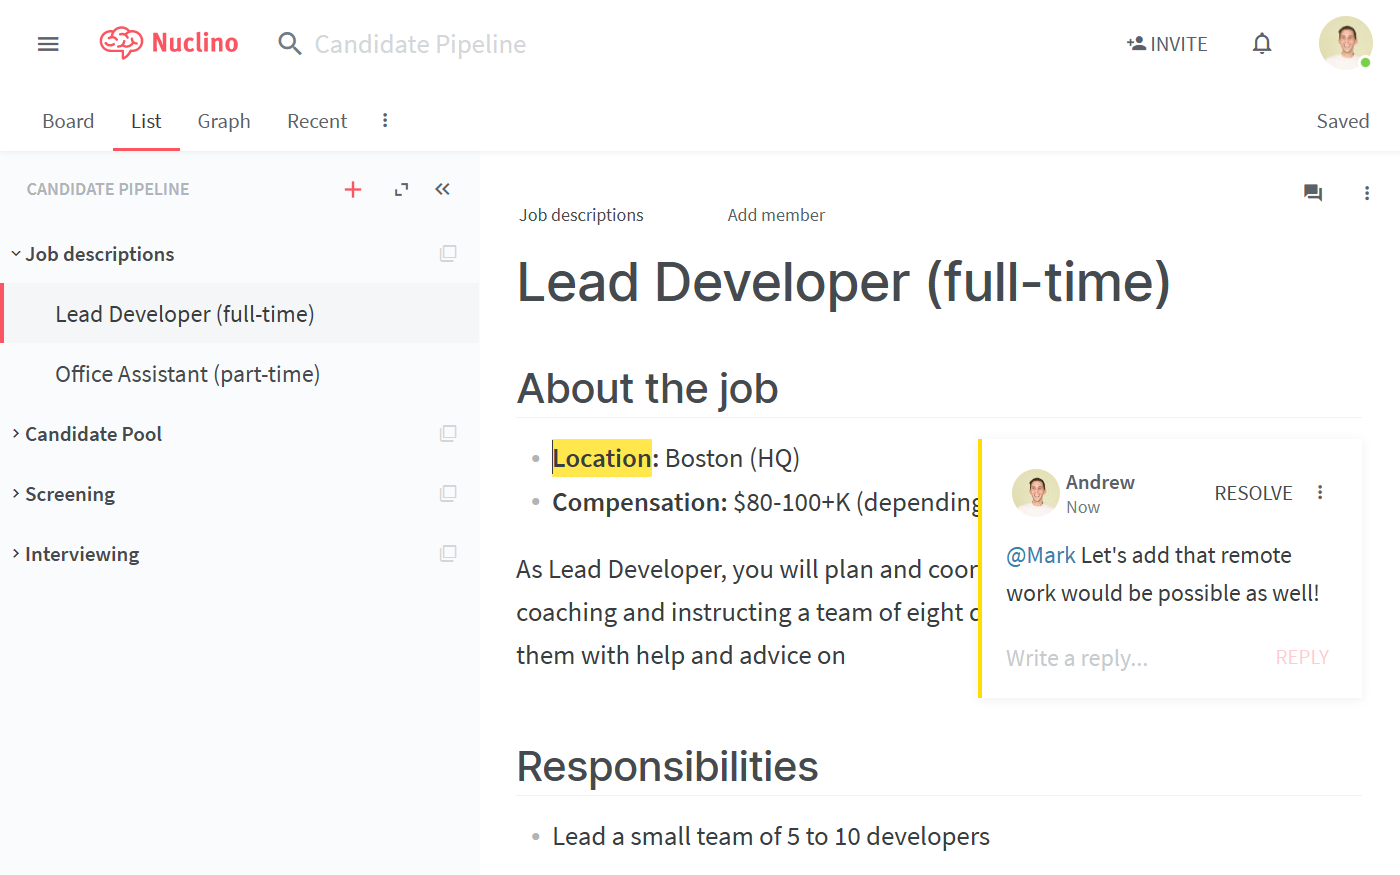
Step 3: Collaboratively create the job descriptions
A Nuclino item can contain text, images, task lists, tables, and more – click the + button when you're on a new line in the editor or trigger a slash command / to get an entire list of the possibilities. When referencing different items within your workspace, type @ to easily create an internal link.
Every piece of content can be edited by you and your colleagues in real time. Use inline and item comments to discuss and leave feedback, and click Follow to be instantly notified about any new comments in the item.
Step 4: Publish the job descriptions
Every Nuclino item can be shared publicly in read-only mode. It would become accessible to anyone with the shared link, regardless of whether they have a Nuclino account.
You can always turn the sharing off if you need to.
Every change you make to the job description from within Nuclino will be automatically and instantly reflected in the shared item, making it very easy to make updates.
👏 You're all set!
Have questions or looking for more tips? Email us at contact@nuclino.com!