Product roadmap
A product roadmap needs to clearly outline the vision, direction, priorities, and progress of the product – and it needs to evolve over time.
In Nuclino, your team can discuss and collaborate on features, keep track of tasks, share and organize user feedback, and more, creating a transparent development process.
Here's how you can set up your product roadmap in Nuclino in just a few easy steps.
Step 1: Create a workspace
Get started by creating a separate workspace for your product roadmap:
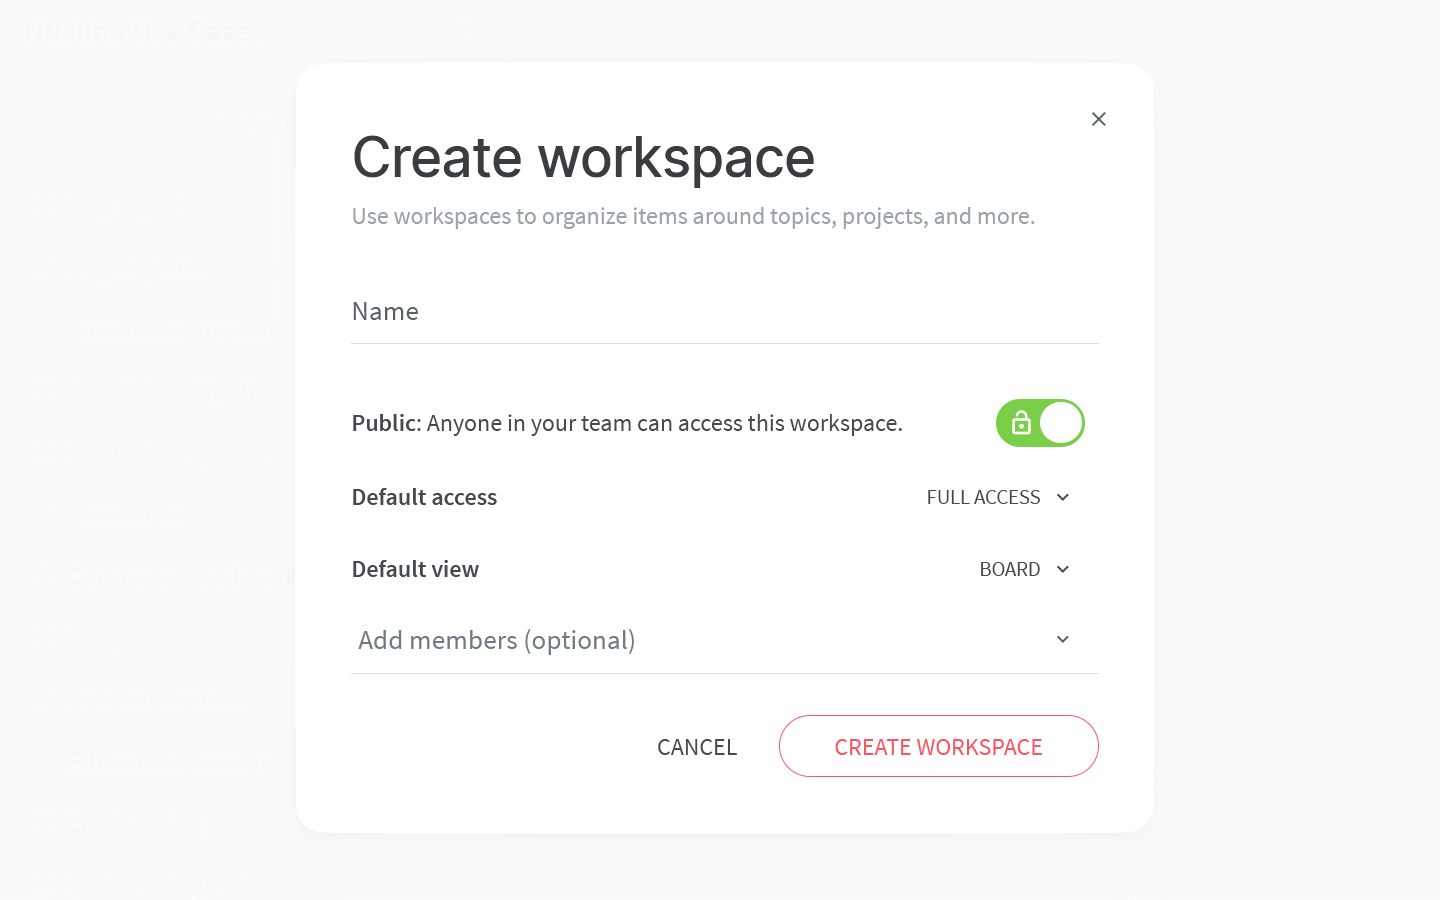
To set up your workspace, you will need to configure:
The default view of your workspace.
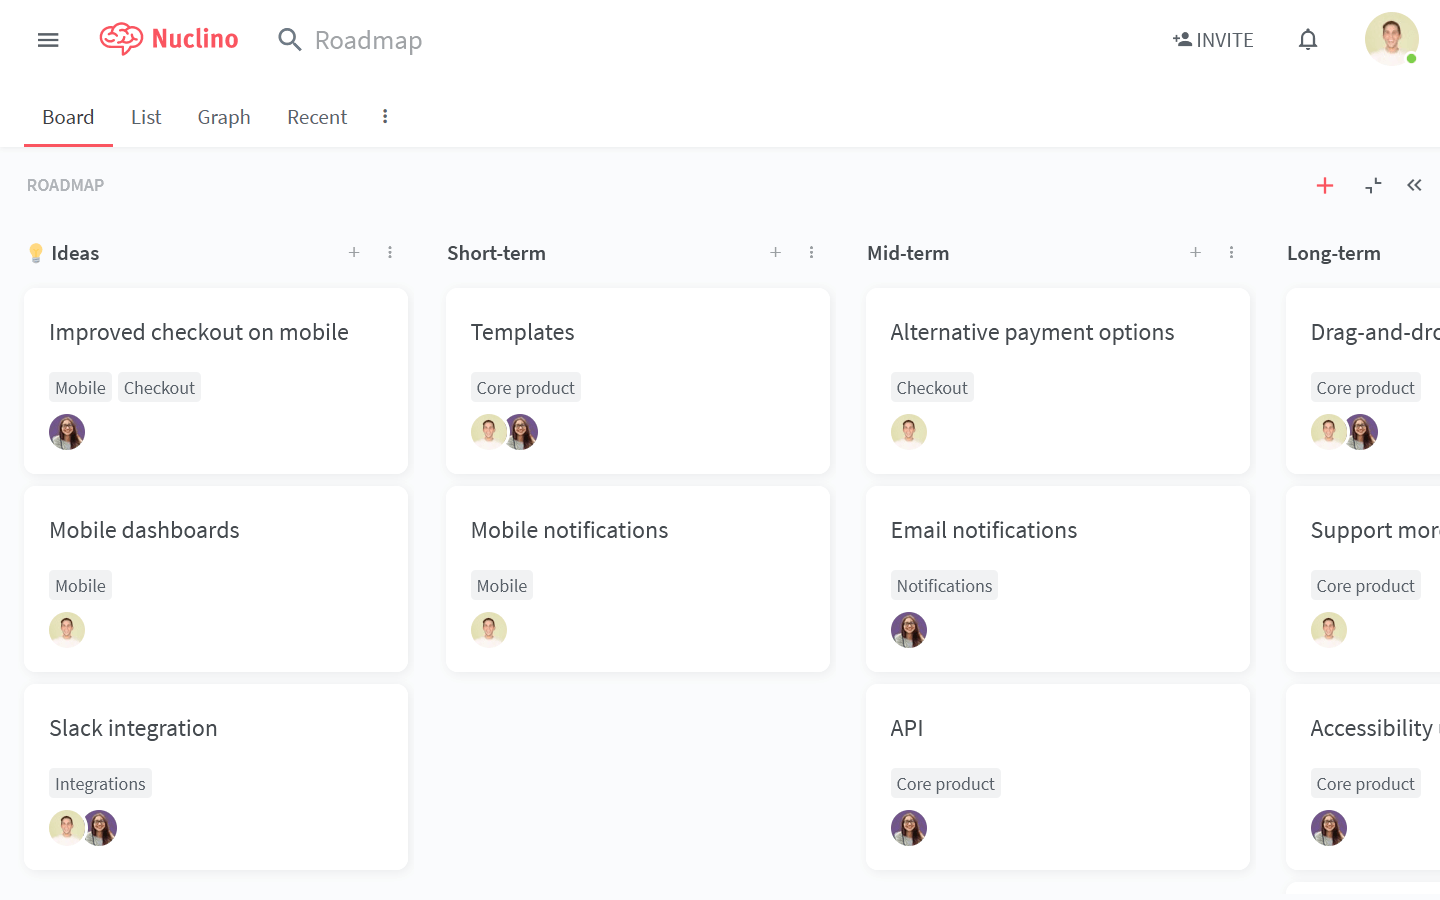
You have the choice between the list, board, table, and graph views. The board view is a great way to visualize your product roadmap as it lets you see the development stage of each feature and milestone. Don't worry, you can always change it later!
Privacy.
You can make your workspace public – visible and accessible to your whole team – or private, so that only you and invited members can see it. Since being up-to-date with the product roadmap is relevant to the whole team, it's best to make this workspace public.
Access rights.
A product roadmap is constantly evolving – enable your team members to easily contribute content and keep this workspace up-to-date by making it editable by default.
Step 2: Set up the core structure
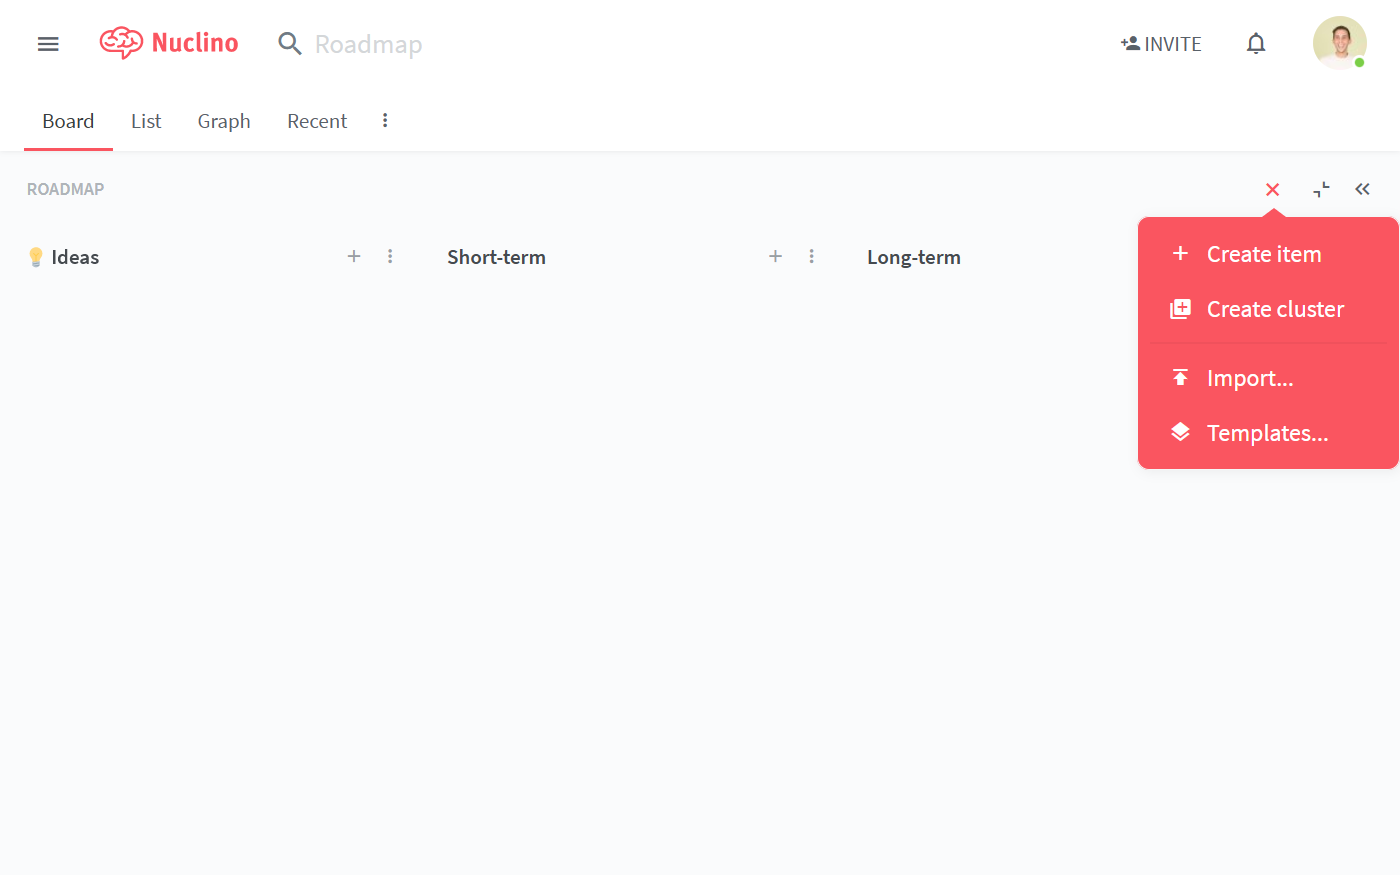
Content in Nuclino is made up of items (board cards) that are grouped in collections (board lists). You can start setting up your roadmap board by creating a collection for each stage or section of your roadmap.
For example:
Ideas
Short-term
Mid-term
Long-term
Ongoing improvements
Sprint candidates
Done
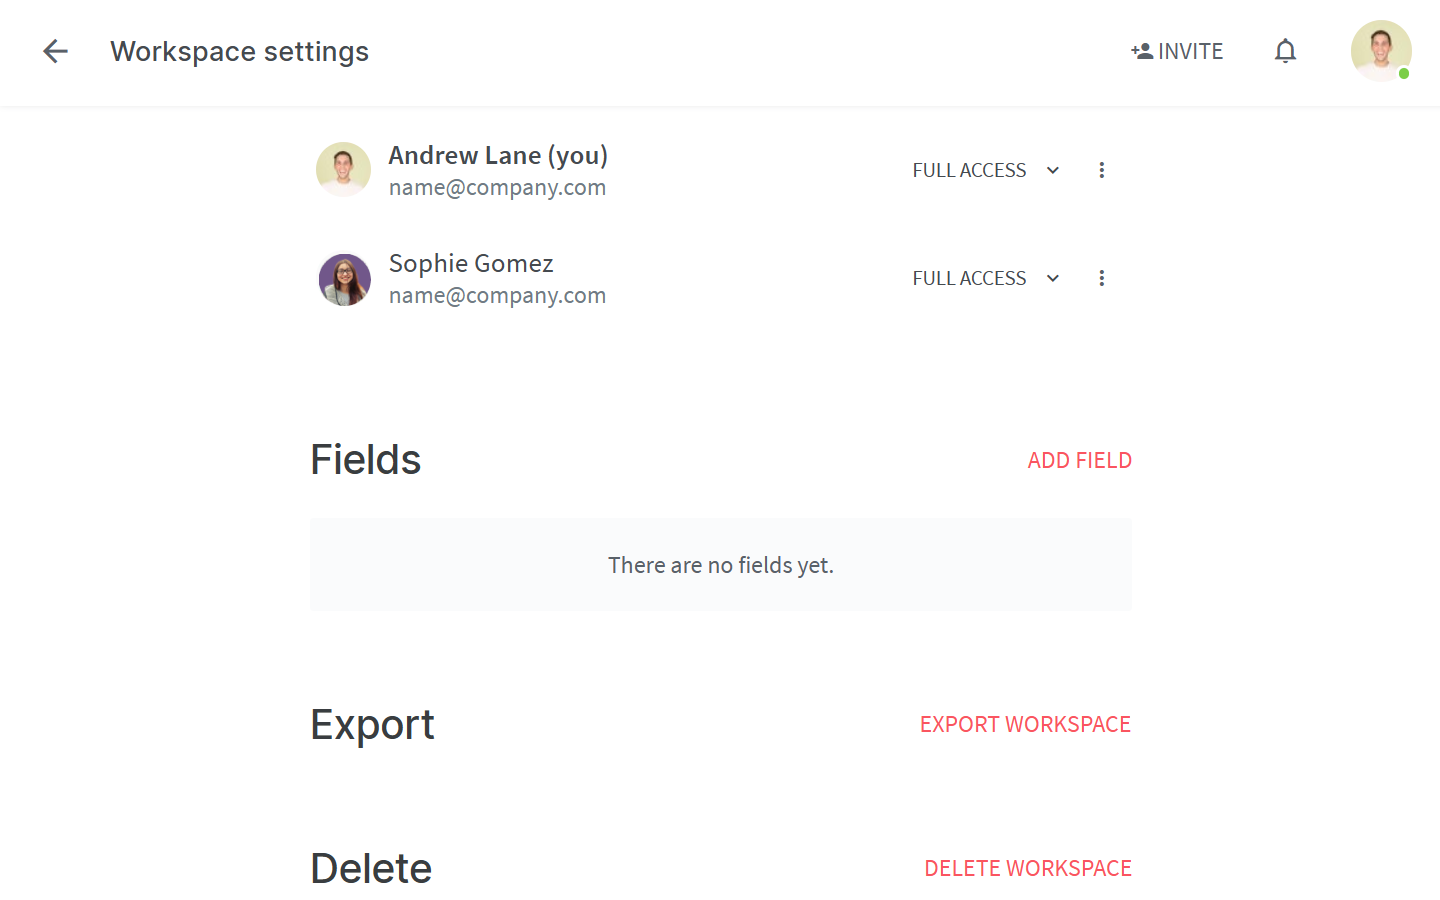
You can track additional information about each item on your roadmap using fields. Fields can be created for labels, status, owners, priority, or anything else that’s important to your workflow. Fields can be configured in the workspace settings.
Step 3: Plan and assign features
You're ready to start adding events and milestones!
Create a separate item for each new feature on your product roadmap under the respective collections. Use fields to assign a team member (or multiple members) to every item.

The assigned team member will receive an instant notification and their profile picture will appear on the item card. They will also be notified whenever another member leaves a comment in the item, so they will always be aware of the feedback the team may provide on his or her progress.
Step 4: Collaborate and keep the roadmap up-to-date
Once you have your roadmap in place, you can add more context to each milestone or feature. For example, you can reference user feedback, add screenshots or mockups, specify development and design requirements for implementation, and more. Your team members can easily give feedback using inline and item-level comments.
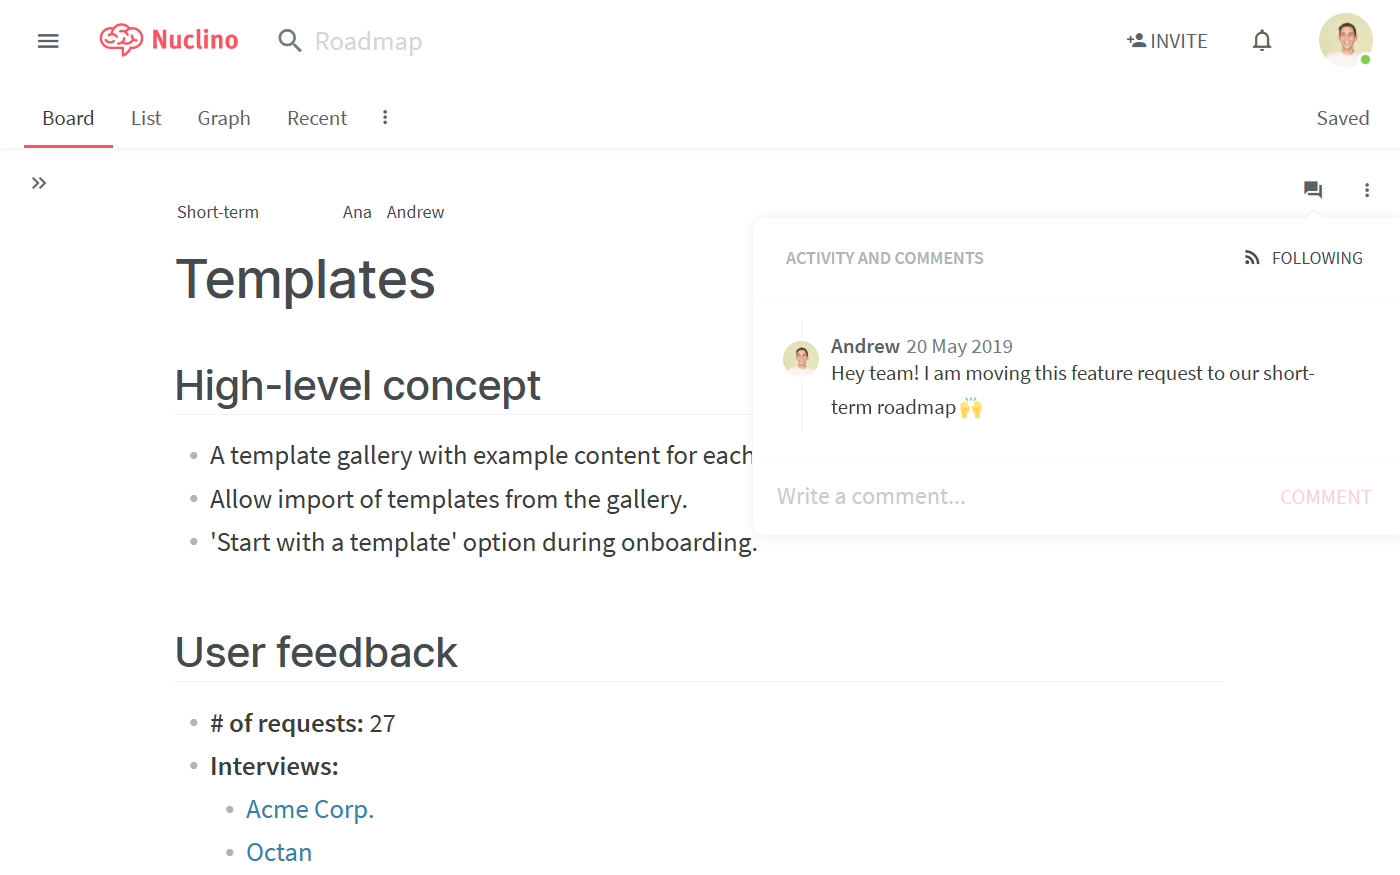
When priorities change or when a feature becomes a sprint candidate, simply drag and drop the items to the relevant collections to keep the roadmap up-to-date.
💡 Nuclino Tips:
Internal links in Nuclino work across workspaces! For examples, if a feature on your roadmap is planned for an upcoming sprint, you can reference relevant tasks and items from your Sprint workspace by simply typing
@and selecting the relevant item.
👏 You're all set!
Have questions or looking for more tips? Email us at contact@nuclino.com!