Use tables
Who can use this feature?
🔐 Only workspace members with full access can add and edit tables.
⭐️ Available on all plans.
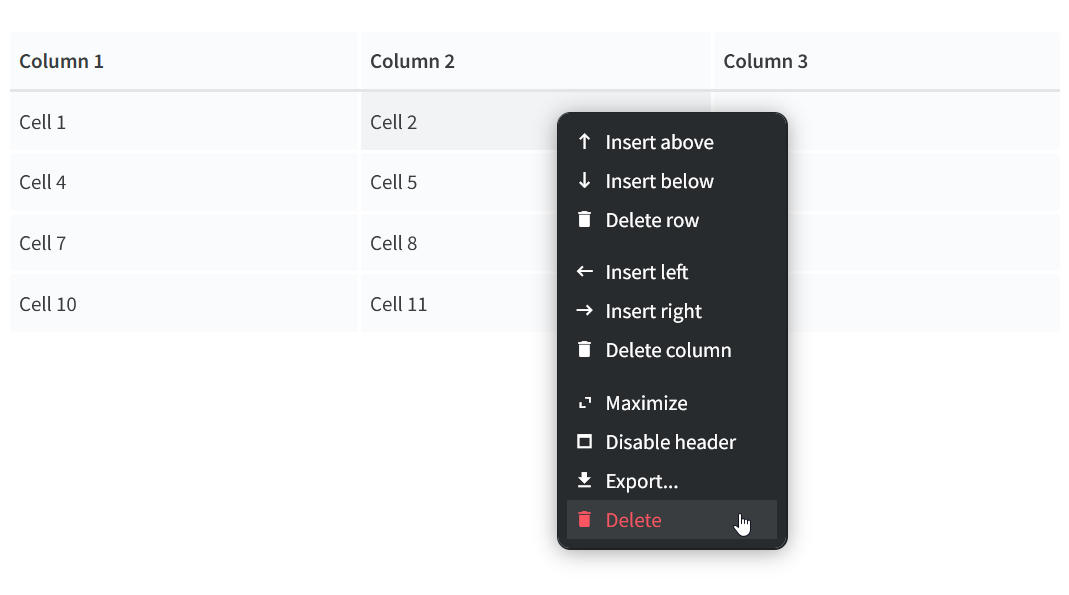
Tables allow you to capture and sort information in a structured way. Table cells can contain text, lists, tasks, quotes, equations, dates, images, files, and other content.
To add a table
Using the insert menu
Open the item or collection in which you'd like to add a table.
Click on an empty line or create a new one.
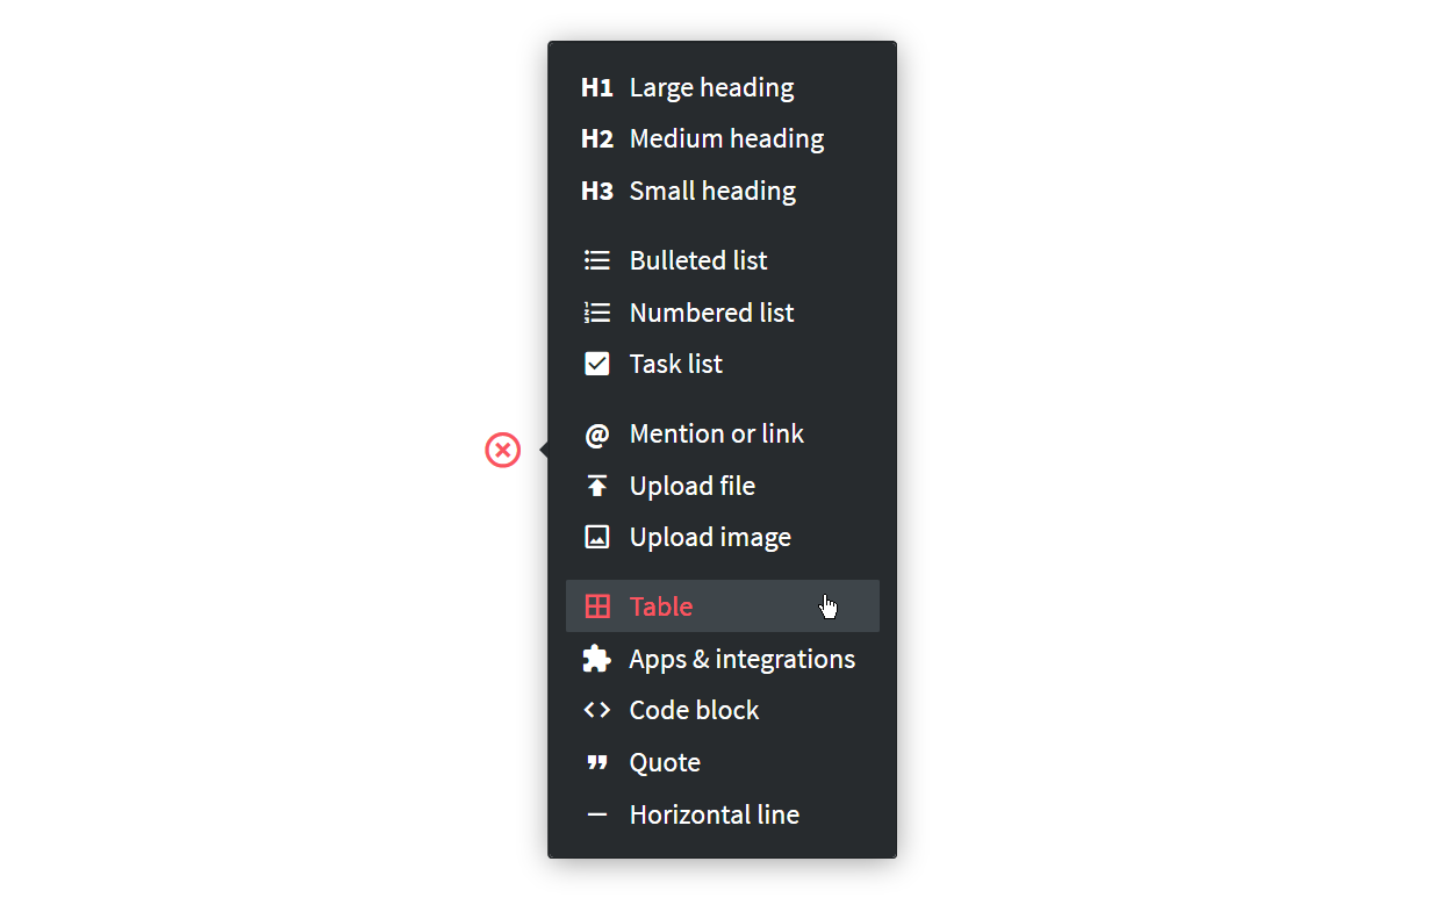
Click on the red
+insert button.Select Table.
Using the slash command
Open the item or collection in which you'd like to add a table to.
Type
/at the beginning of an empty line.Select Table.

To add or delete rows or columns
Right-click a row or column.
Select Insert (above, below, left, or right) or Delete (row or column).
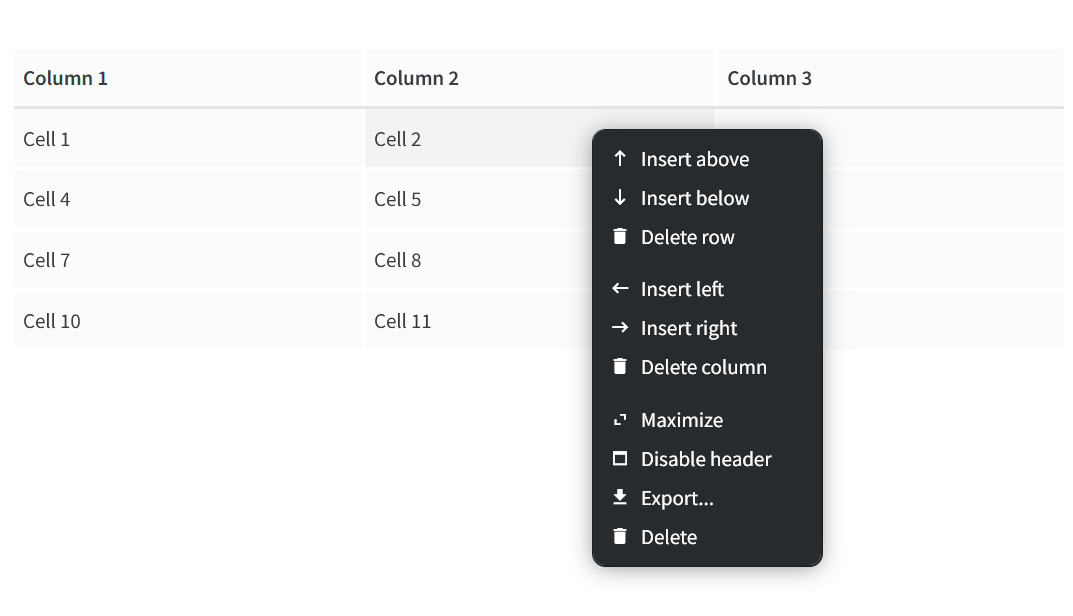
You can also add or delete multiple rows or columns at once by selecting several rows or columns, right-clicking them, and selecting the appropriate option.

Shortcuts
You can quickly add rows by going to the last cell and hitting Tab repeatedly.
You can delete rows or columns by selecting them and pressing Ctrl/Cmd + Backspace/Del.
To enable or disable the table header
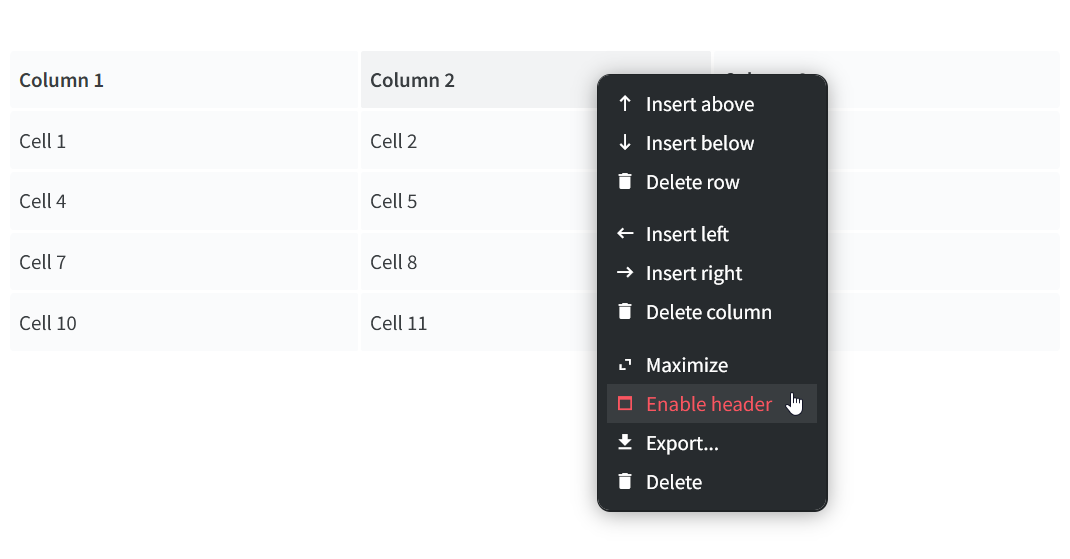
Enabling the table header allows you to sort by columns and change the column size.
Right-click on a table.
Select Enable header or Disable header.
To sort by column
Enabling the table header allows you to easily sort the data in your table. All kinds of content can be sorted, including text, numbers, dates, internal links, mentions, and files.
Make sure the table header is enabled.
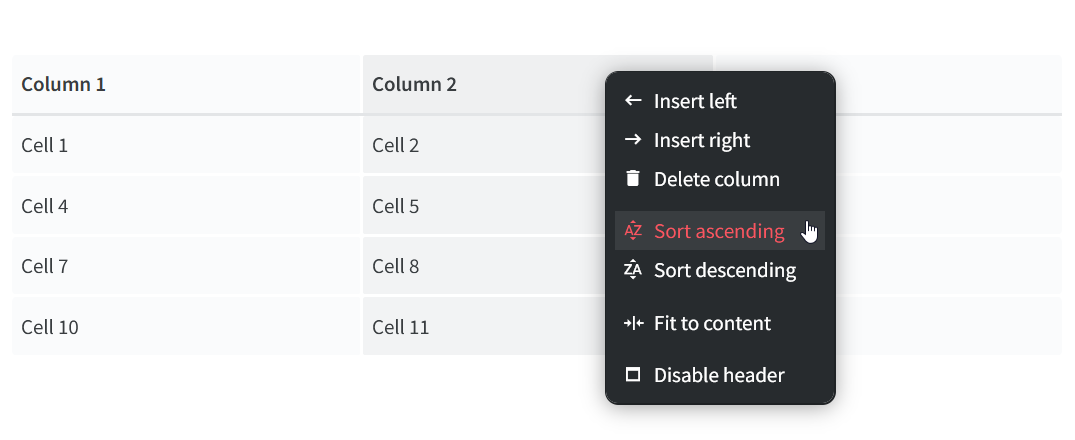
Right-click a column in the table header.
Select Sort ascending or Sort descending.
To change the column size
Rows and columns are automatically resized based on their content to save you time.
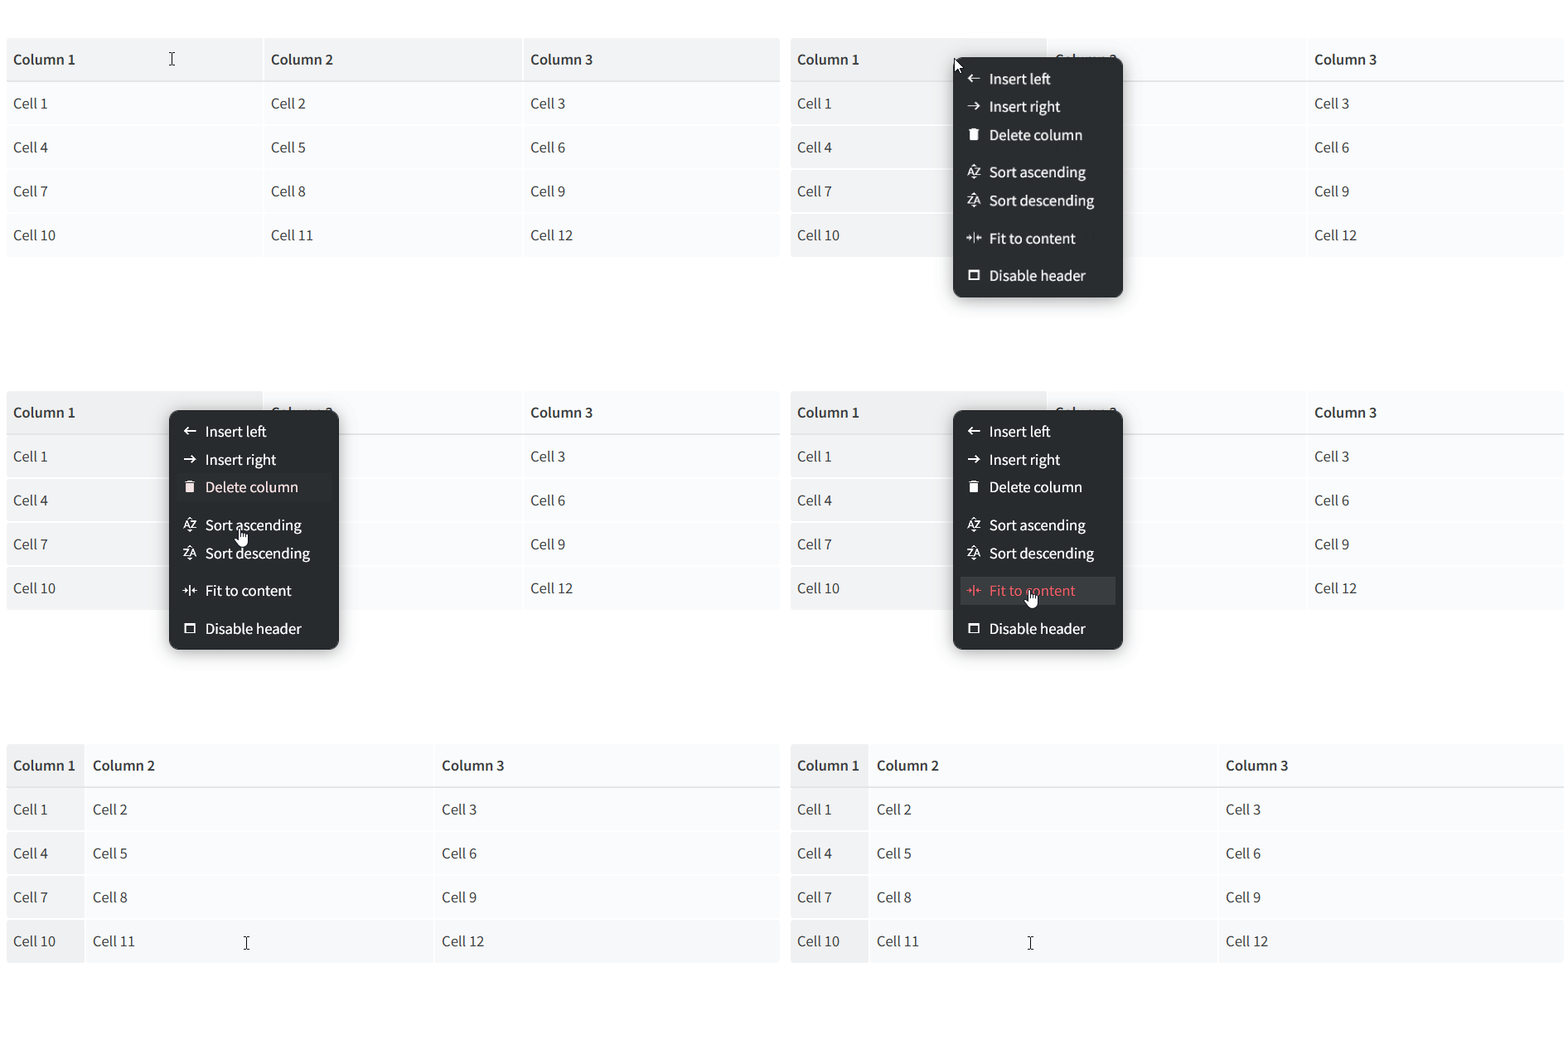
If you want a column to perfectly fit its content and display it without line breaks or unused space, you can set the column size to Fit to content instead of Default size:
Make sure the table header is enabled.
Right-click a column in the table header.
Select Fit to content or Default size.
To maximize or minimize a table
Large tables can be maximized in order to provide more horizontal space for the table data.
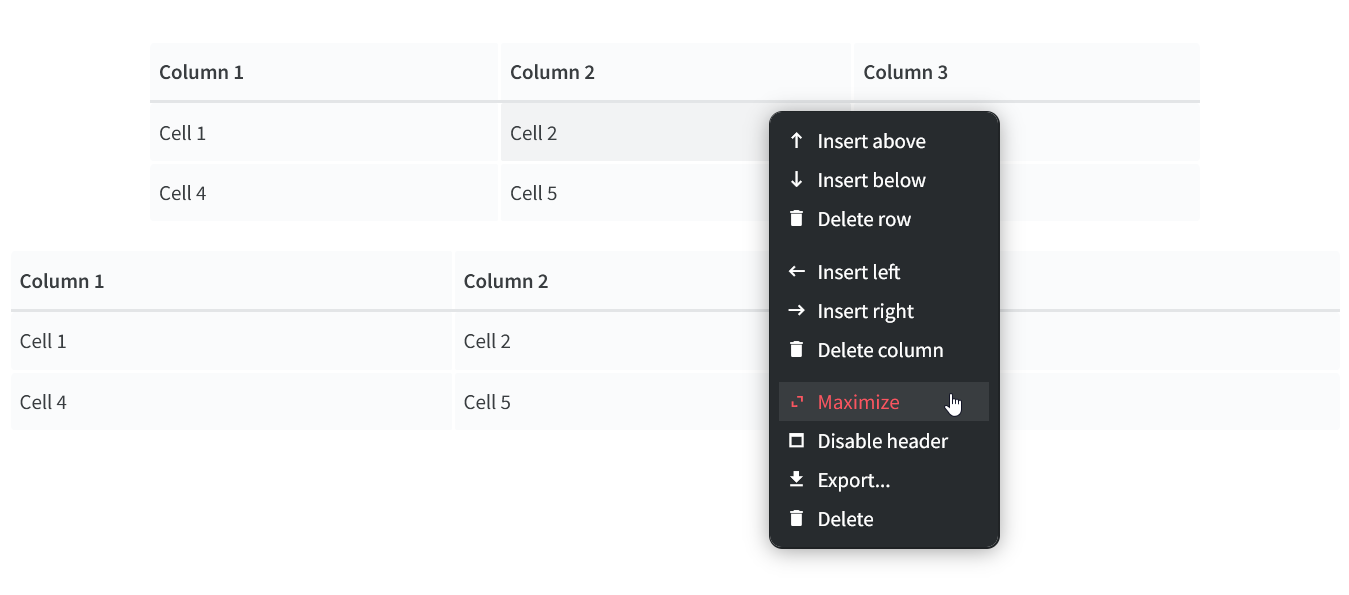
Right-click the table you'd like to resize.
Select Maximize to allow the table to take up more horizontal space.
Select Minimize to restore the default width of the table.
To export a table
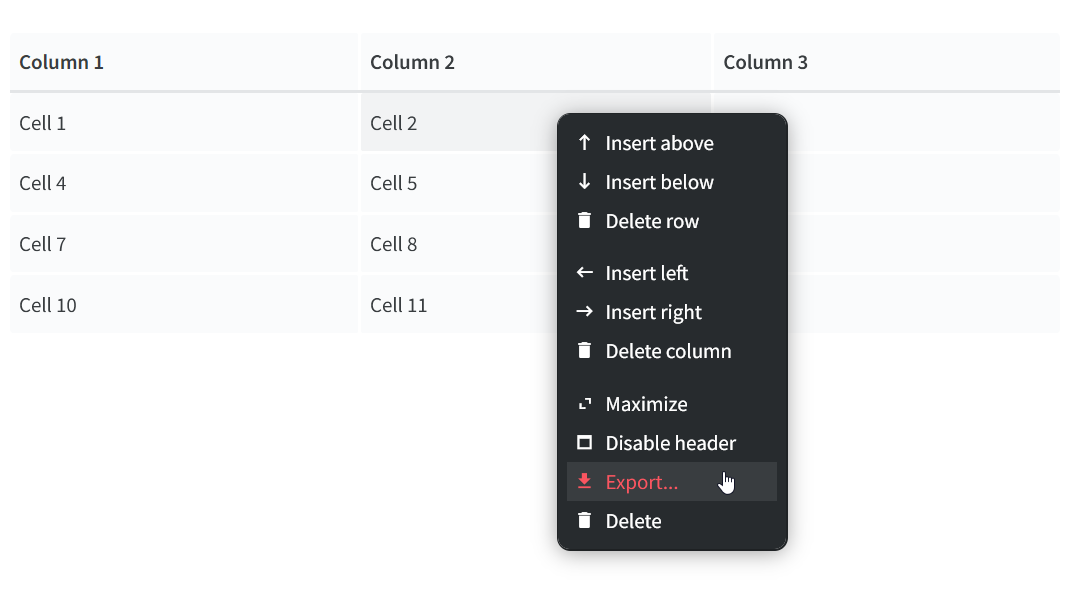
Right-click the table you'd like to export.
Select Export...
Select the CSV or XLSX as the file format.
To delete a table
Right-click the table you'd like to delete.
Select Delete.
You can also select the entire table and press Ctrl/Cmd + Backspace/Del.
