Setting up your first workspace
Create a workspace
After you have created your team in Nuclino, time to set up your virtual workspace. It can be a workspace for a specific topic (e.g. HR Policies), department (e.g. Engineering), project (e.g. New App Release) – anything you want.
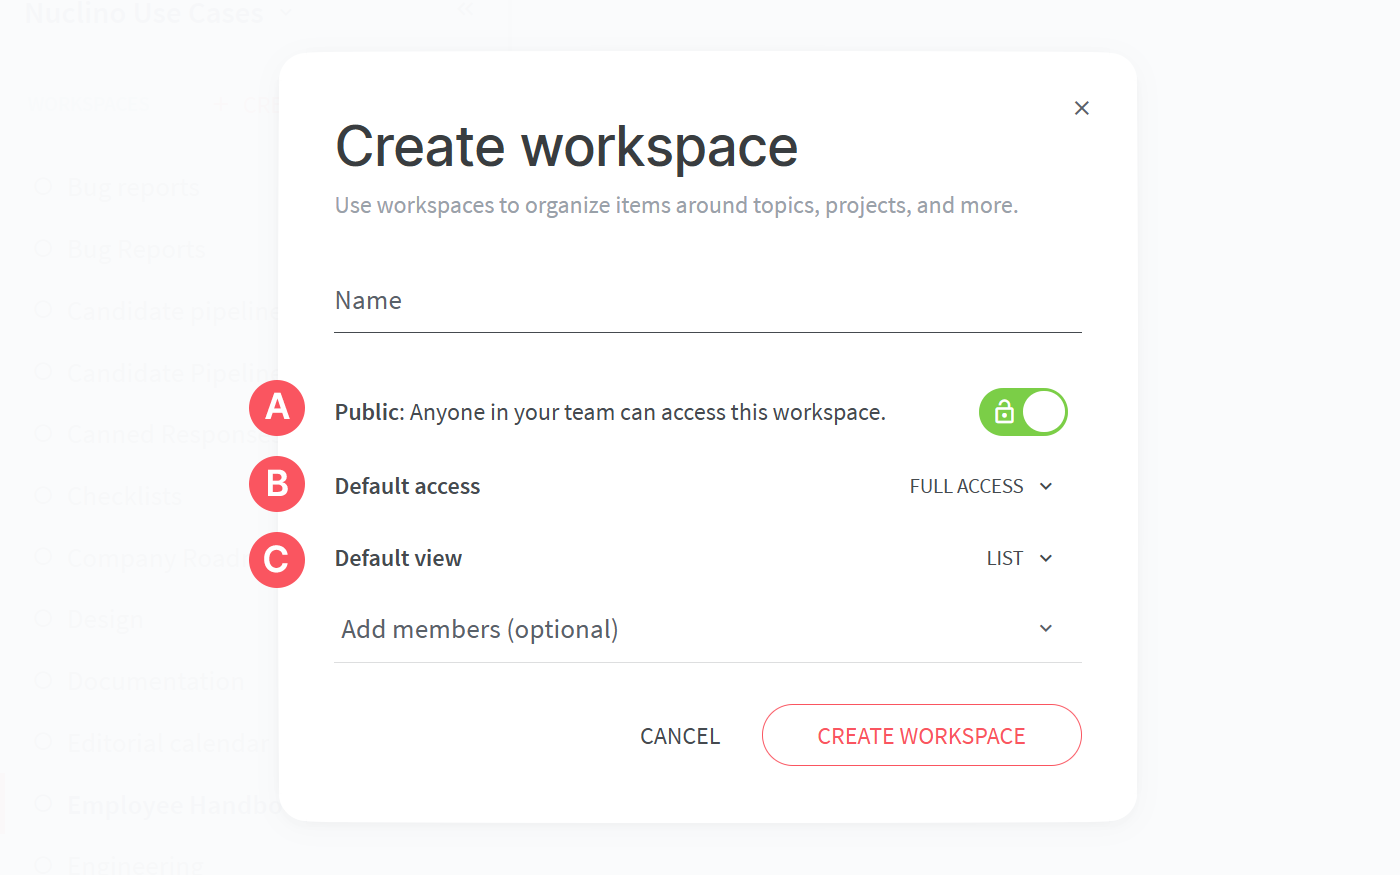
When setting up your workspace you can decide:
(A) Who can access your workspace.
Public workspaces can be seen and accessed by anyone on your team by default. Create public workspaces for information that needs to be shared with everyone, such as company policies.
Private workspaces are accessible only to selected team members and are invisible to the rest of your team. This setting is useful for storing and sharing confidential information, for example, related to performance reviews, salaries and so on.
(B) Who can edit the content of your workspace.
Full-access workspaces can be read and edited by all team members by default. These workspaces are great for fostering collaboration on team projects.
Comment-only workspaces can only be read and commented on by default. Such workspaces can be used for information that is supposed to be edited by approved members only, while the rest of the team is invited to leave feedback.
Read-only workspaces can only be read by default. Such workspaces can be used for information that may need to be accessed by everyone but only edited by approved members, for example, brand guidelines.
Regardless of the default workspace role, you can always adjust the role of a user in the workspace settings. Learn more in our Help Center: Access and Security.
(C) The default view of your workspace.
The list view shows your content in the form of a hierarchical list. It's great for many use cases where structure plays an important role, for example, a knowledge base.
The board view helps you track your work in a workflow or sort content by topics or categories. You can use collections as columns to visualize the different stages of your project.
The table view allows you to organize multiple docs and tasks in a compact, manageable format. It's great for managing long lists of similar docs and tasks — sales leads, job descriptions, bug reports, blog posts, meeting notes, and so on.
The graph view provides a quick overview of your content and helps you explore it in a visual way. It can, for example, be helpful when onboarding new members.
Create items and collections
After setting up your workspace it's time to add some content to it. The fundamental unit of a workspace is an item. Items are documents that can be edited in real-time by multiple users and contain many different kinds of content such as text, images, tables, code, embeds, and more.
You can create items for different types of content, for example, how-to guides, meeting notes, ideas – anything you want to store, share, and collaborate on. Visit our item Template Gallery for inspiration.
You can create an item by clicking the + at the top of the sidebar and selecting Create item in the drop-down menu.
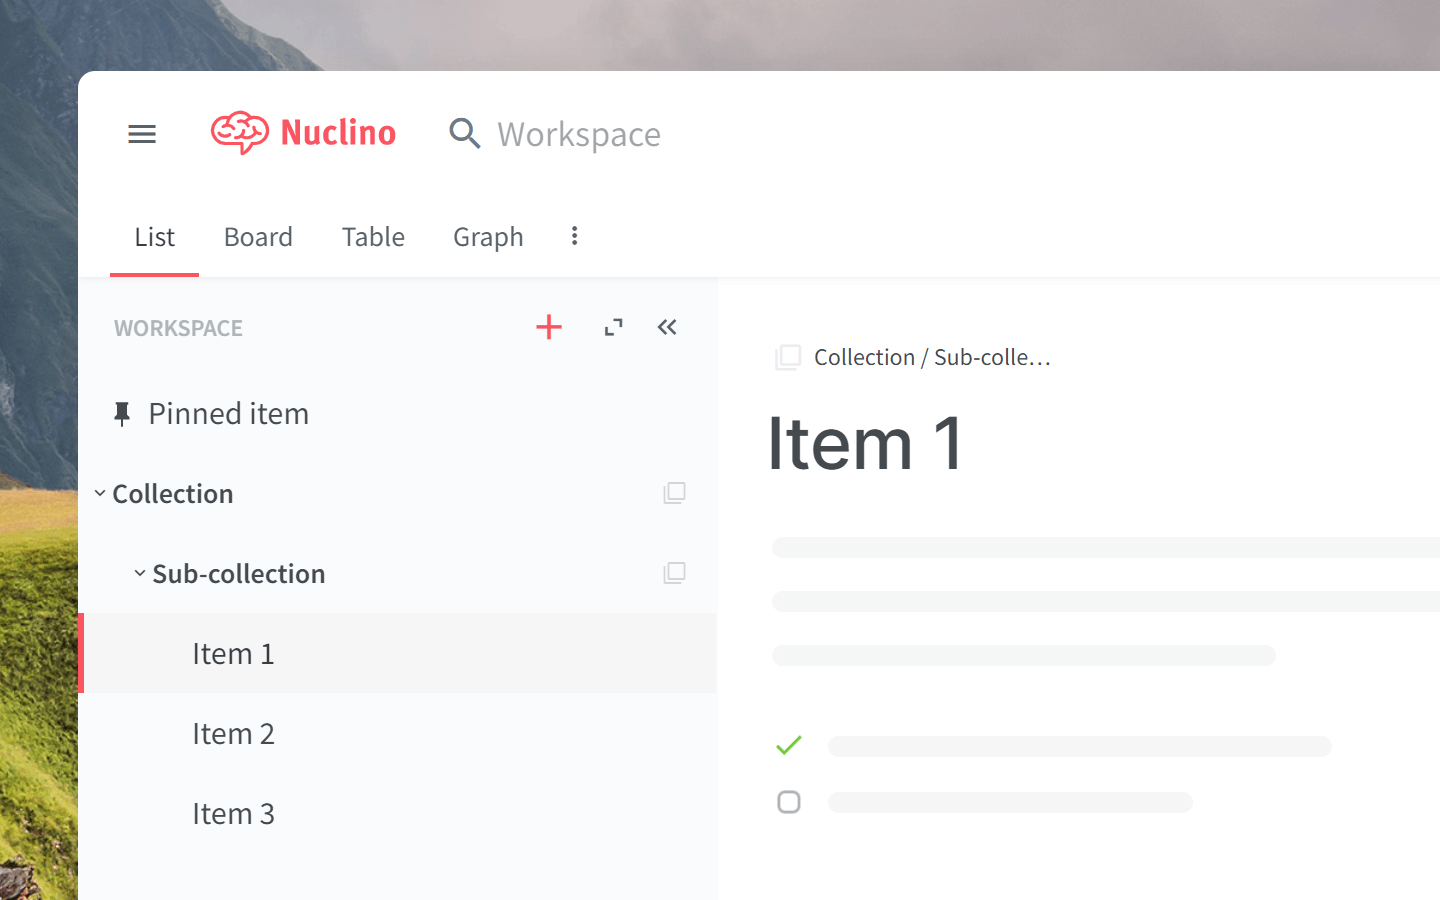
Related items can be grouped into collections. For example, you can create a "Meeting notes" collections to keep all of your items containing meeting notes in one place.
Customizing your workspace
Nuclino is a flexible and easily customizable tool that can accommodate the unique needs of different teams. Depending on whether you are using Nuclino as an internal knowledge base, a company wiki, a documentation or collaboration tool (or all of the above), different workspace setups might work better for you.
Here are a few tips on setting up your workspace in Nuclino.
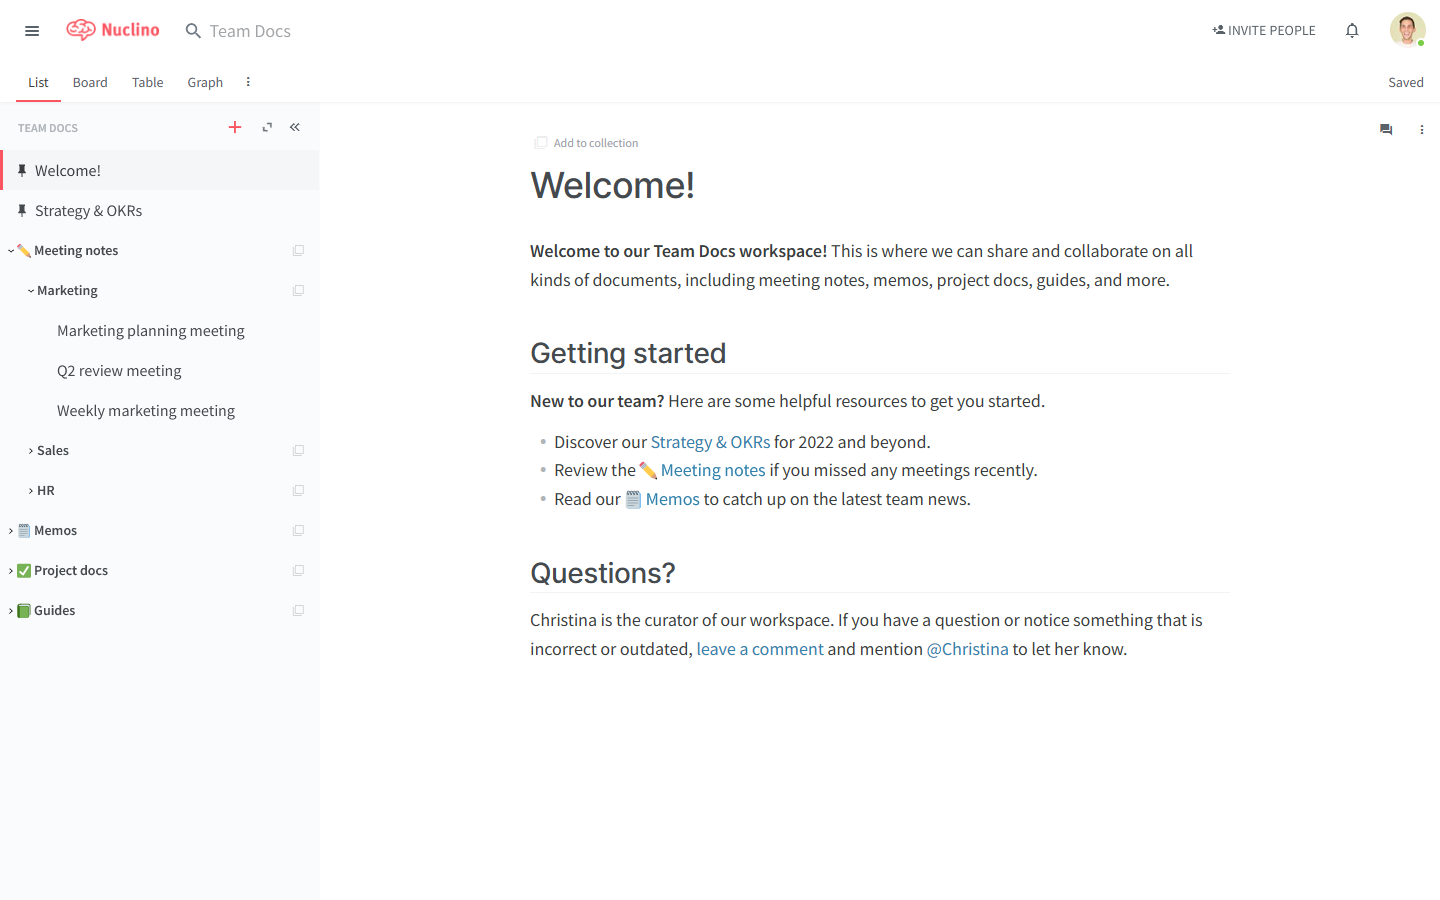
Workspaces for storing and sharing knowledge
Nuclino is great for storing your company knowledge in a transparent and easily discoverable way. A good way to set up your company wiki in Nuclino would be to create collections for common topics, for example guides, policies, contact information, troubleshooting, and so on. Your wiki can live in the same workspace, or different workspaces can be created for different topics or departments.
Useful features:
Pinning items containing the most frequently requested information, such as passwords or FAQ, to the top of the list.
Access rights customization and read-only/comment-only workspaces.
Examples & tutorials:
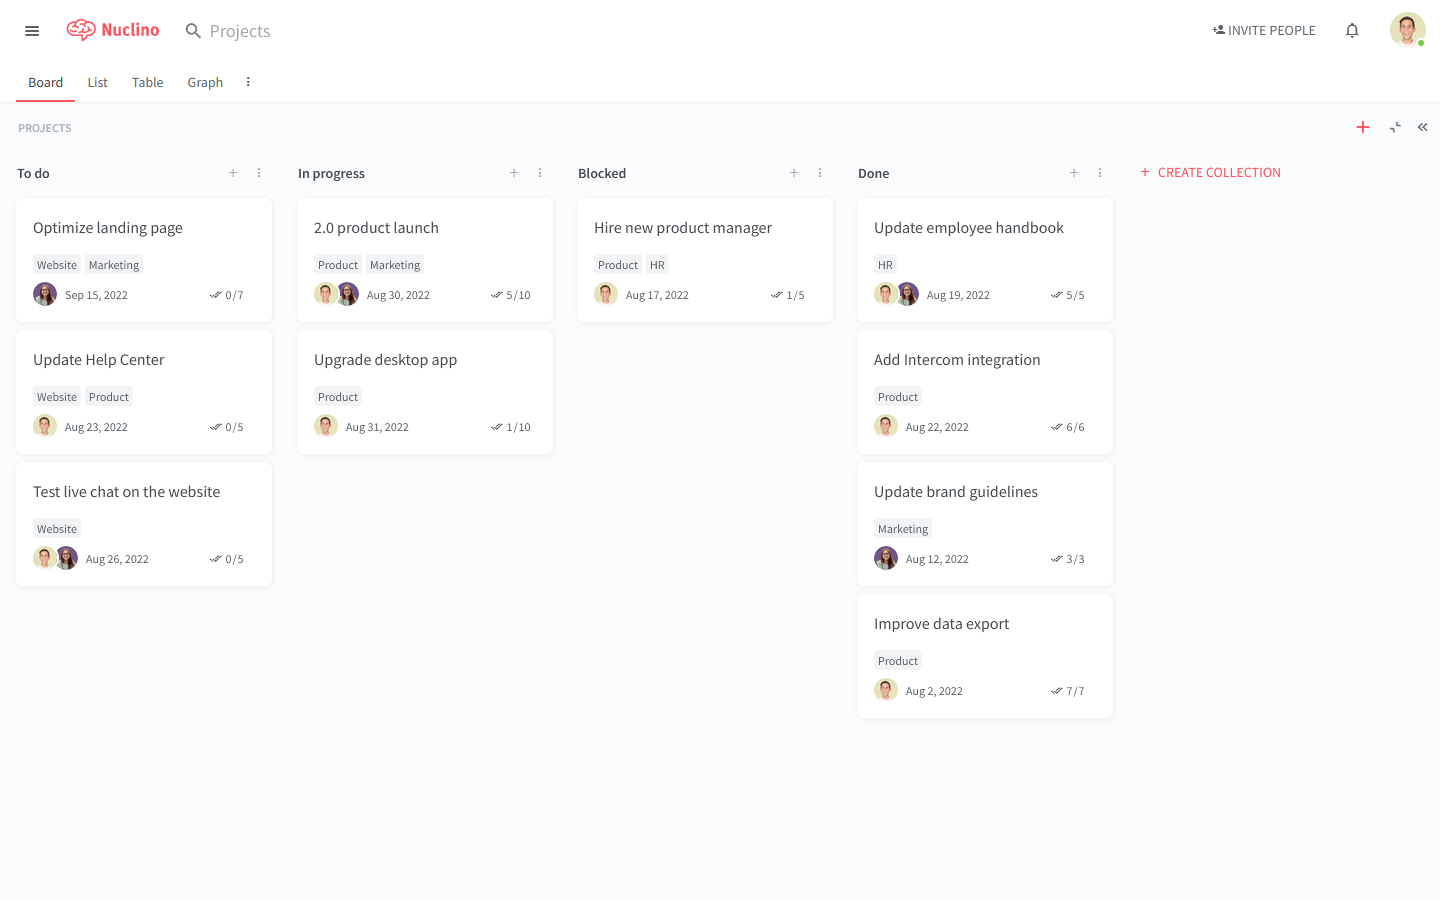
Workspaces for tracking progress
The board view makes it easy to track progress and view your items in a workflow. If you want to use Nuclino as a project management tool, the easiest way to set it up would be to create the "To do", "In progress", and "Done" collections and you simply drag and drop items from one column to the other.
Useful features:
The board view to display your items in a Kanban board.
Fields to track additional information about items, such as dates, owners, labels, or anything else that’s important to your workflow.
Checklists with itemized task lists.
Examples & tutorials:
Workspaces for collaborating
Nuclino was designed to facilitate team collaboration and make member contributions as effortless as possible. If you want to encourage your team to exchange ideas and feedback, you might want to set up a workspace accordingly, creating items and collections that are open for everyone to view and edit.
Useful features:
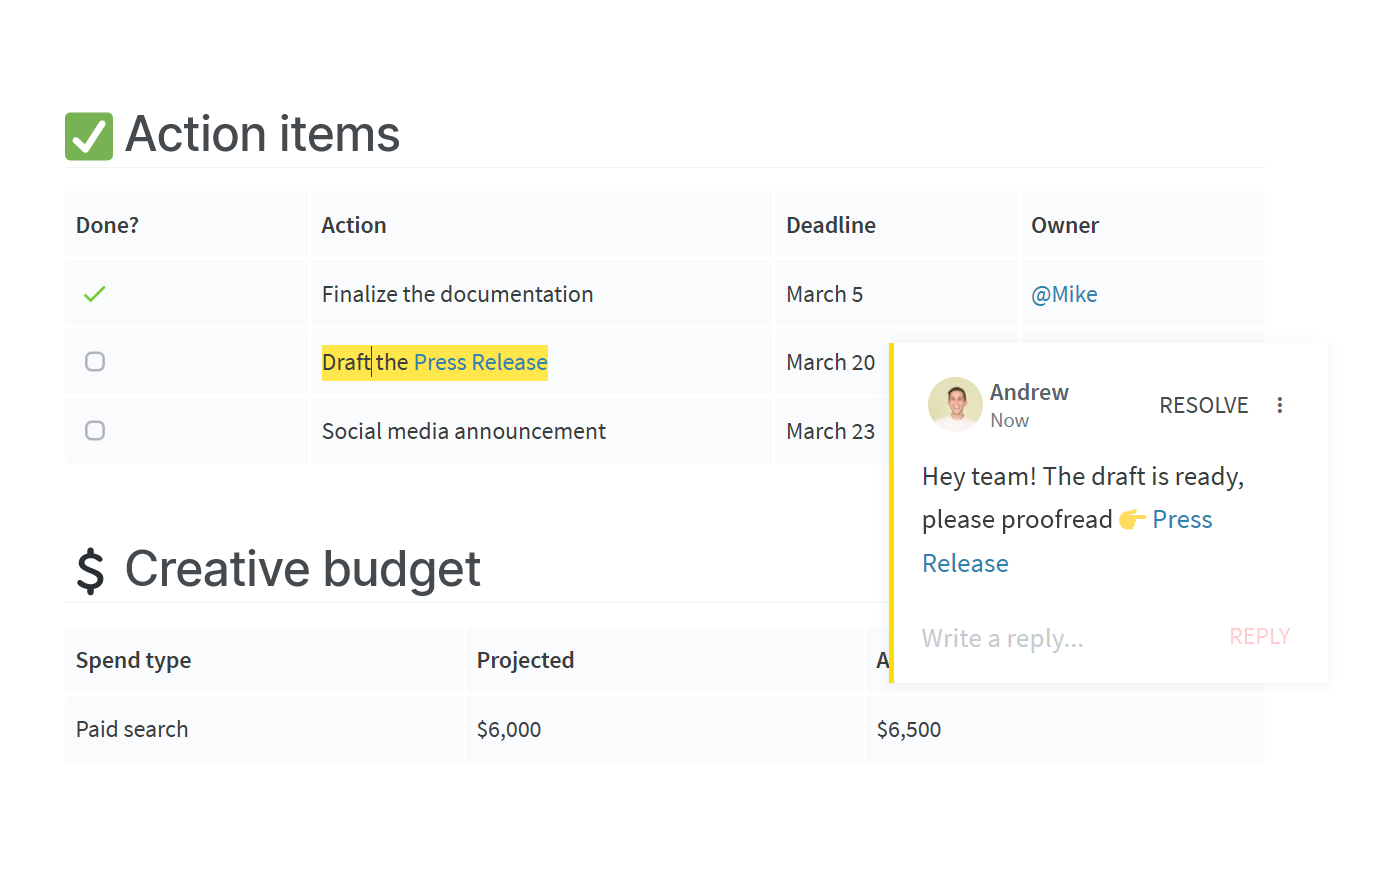
@-mentions within items to tag your colleagues and send them instant notifications.
Inline comments to start team discussions.
Full-access public team workspaces.
Examples & tutorials: