How to organize data in Nuclino
Our daily work often involves managing long lists of similar docs and tasks — sales leads, job descriptions, bug reports, blog posts, meeting notes, and so on. In this tutorial, you will learn how to organize them in a compact and manageable format in Nuclino.
Setting up your workspace
Want to skip the manual setup and jump right in? Nuclino can be used to organize all kinds of data — import one of our ready-to-use templates and customize them to fit your needs.
Prefer to start from scratch? Create a new workspace and make the table view your default.
Basic structure
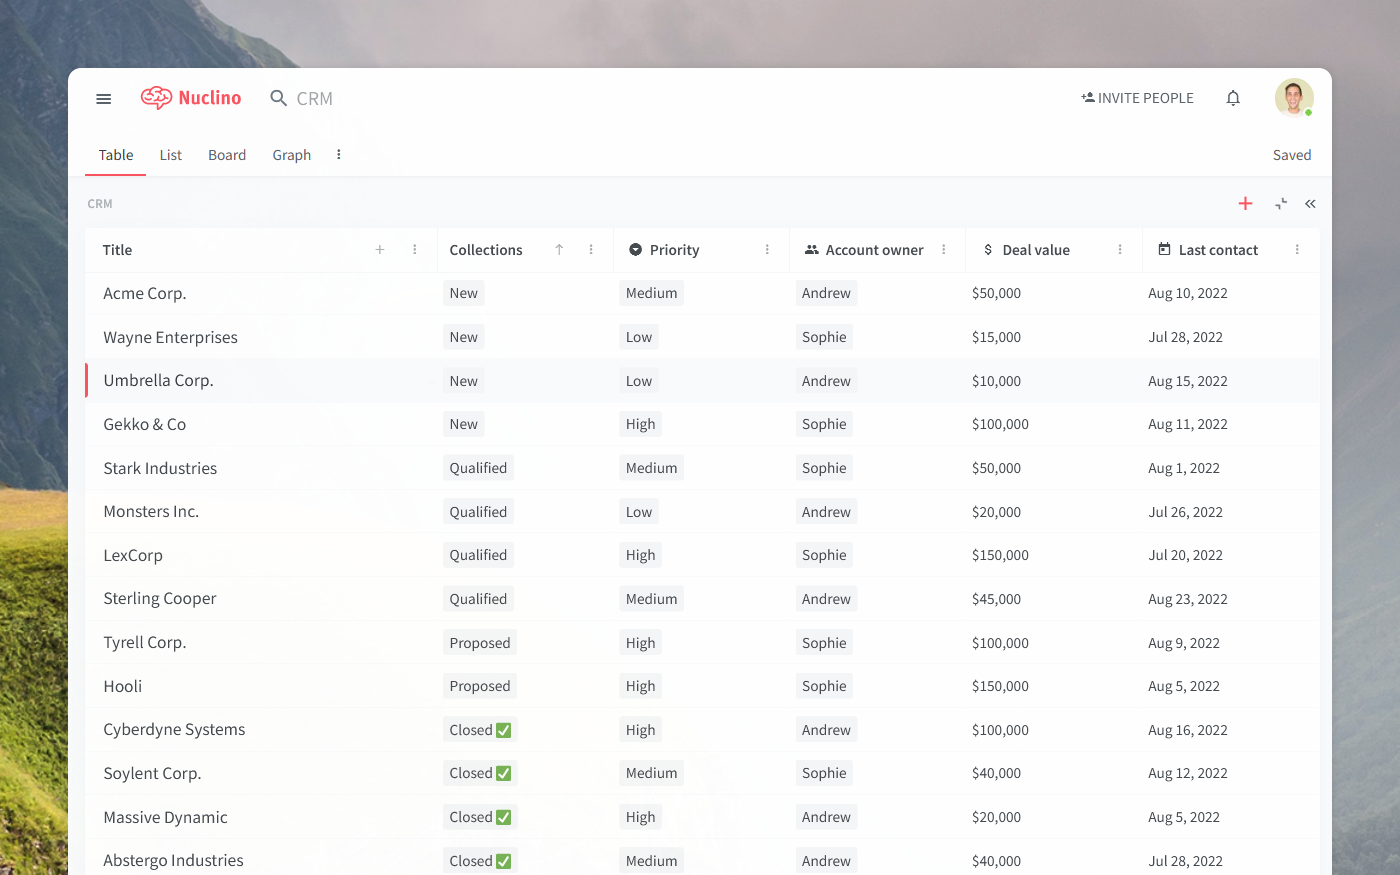
The table view is great for organizing, filtering, and sorting data.
The rows of your table are made up of items — collaborative long-form documents, where you can add all kinds of content. The columns are collections and fields, which allow you to group and label your entries.
Adding items
To add a new item, hit the + at the top of the first column.
Items can contain text, tasks, images, videos, tables, code blocks, LaTeX equations, embeds, and more. You can collaborate in real time, with every change automatically saved in the version history, or exchange asynchronous feedback using inline and item comments.
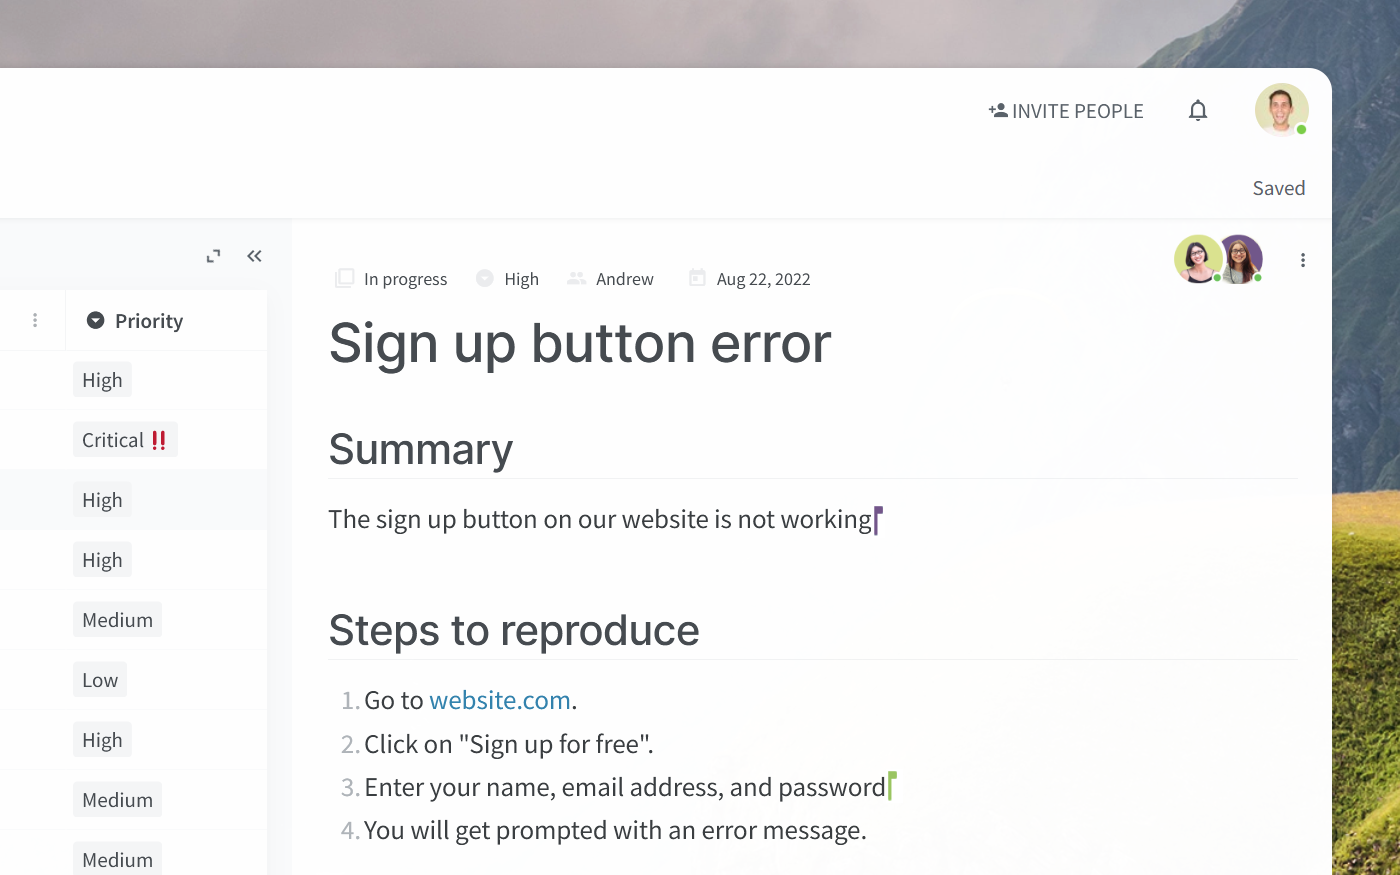
This way you can not only organize your work in a structured way, but also capture all the relevant context, without the need for a separate documentation tool like Google Docs.
Configuring columns
Collections
The second column of your table displays the collections, which help you group your docs and tasks.
Fields
The rest of your table is made up of fields. Fields allow you to track additional information about your docs and projects, like their status, priority, owner, and so on. There are 11 different field types that help you capture the information in the most relevant format, for example, date or currency.
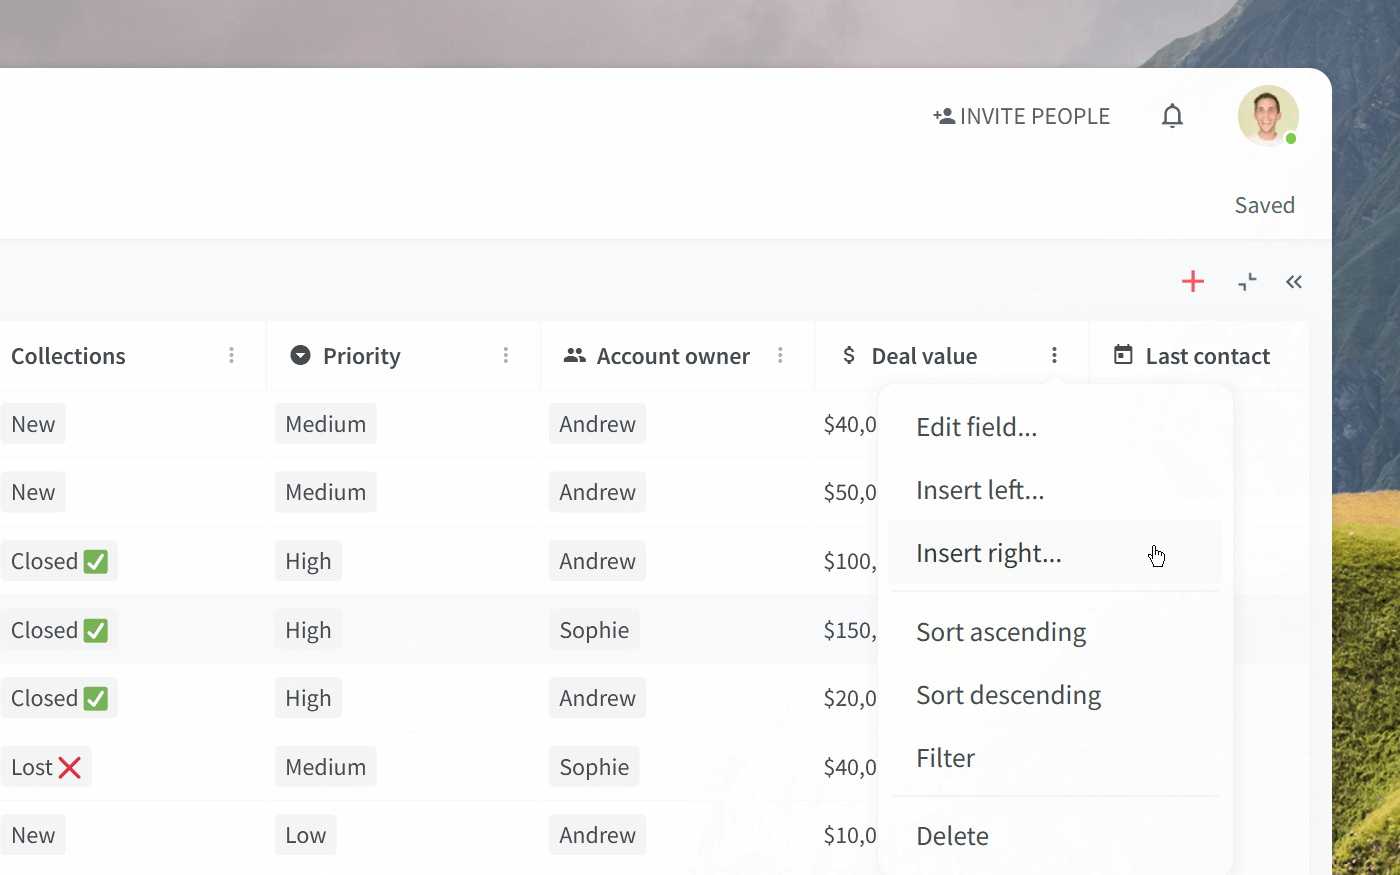
You can create as many fields as you need, and every new field you create will add a new column to your table. To add a field, right-click any column header (or click on ⋮) and select Insert left or Insert right. You can also easily rearrange existing field columns using drag-and-drop.
Sorting
You can sort your table so that items are displayed based on properties appearing in ascending or descending order. For example, you can order them based on their priority, the time they were last edited, or alphabetically.
To sort your items, right-click any column header (or click on ⋮) and select Sort ascending or Sort descending.
Filtering
You can filter your table so it only displays the items that meet specified criteria, for example, only the high-priority tasks, or only the leads that are assigned to you. Right-click any column header (or click on ⋮), select Filter, and choose the values that you'd like to apply as criteria.
Filters can also be added by typing + into the search bar. You can combine as many filters as you need.
Finding information
The simplest way to find the data you need is to ask Sidekick (AI). It can instantly answer any question based on your content in Nuclino.
There are two easy ways to ask Sidekick:
Open the search menu (click the icon next to the search bar) and select Ask Sidekick (AI).
Type your question in the search bar with a
?at the end and pressEnter.
Alternatively, if you prefer regular search, you can:
Type in the search bar to instantly see the items that contain your query in the title.
Press
Enterto search across all your workspaces, including titles and content.Type
+into the search bar to add filters to your search.
The most popular searches are listed in the Insights section of your team settings, helping you identify common questions and make relevant data more easily accessible.
Want to learn more?
Organizing data is just one of many things you can do in Nuclino — learn how to bring all your team's work together in Nuclino and turn it into your collective brain:
Browse our templates to discover even more ways to get the most out of Nuclino!
Questions? We're here to help!
Contact us at: contact@nuclino.com